To create a manual backup:
Go to Websites & Domains > Backup Manager > Back up.
Under “Back up”, you can select which content you want to back up.
Domain configuration is always included in backups. You can choose to
exclude “Mail configuration and content” and/or “User files and
databases” by clearing the corresponding checkboxes.Under “Store in”, you can change where the backup must be stored. By
default, backups are stored on the Plesk server. If you have
configured remote storage, you can store backups in
the remote storage by selecting the corresponding radio button.Under “Type”, select the backup type by selecting the corresponding
radio button:A “Full” backup includes all data you specified during step 2.
An “Incremental” backup contains only the files that changed since
the last previously created backup. Incremental backups are
created quicker and take up less disk space than full backups.
However, to restore an incremental backup, you must have the
corresponding full backup and all previously created incremental
backups available.Note: If you have no backups, the first created backup will always be
a full one. You will be able to choose the backup type (full or
incremental) for successive backups. If you selected only
“Domain Configuration” during step 2, you can only create a
full backup.
If you selected the remote storage option during step 3, you can
split the backup file into volumes. Select the “Create a multivolume
backup, volume size (MB)” checkbox, and then specify the volume size.
This can be useful if the remote storage places restrictions on the
maximum file size.At this point, the backup is ready to be created. There are a number
of optional settings you can configure before creating the backup:Leave a comment about the backup being created under “Comments”.
Comments are visible in the Plesk interface and can help you tell
one backup from another.To exclude log files from the backup, select the “Exclude log
files” checkbox. This can decrease the amount of disk space taken
up by the backup.To exclude specific files or directories from the backup, select
the “Exclude specific files from the backup” checkbox. Type the
path or paths to the directories or files you want to exclude in
the field below. Paths must be relative to your home directory,
for example: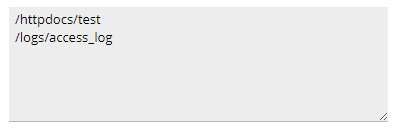
If you want to be notified via email when the backup is created,
select the “When a backup task is completed, send a notification
email to” checkbox. Make sure that the email address next to the
checkbox is correct.
Click OK to create the backup.
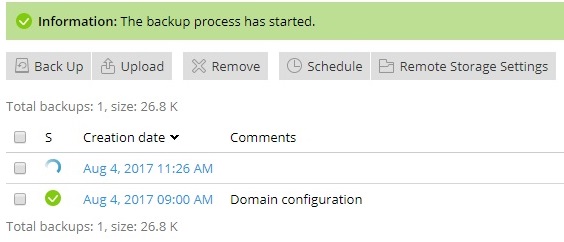
You will be returned to the Websites & Domains > Backup Manager
screen where you can see the backup being created. The backup process
can take some time to finish, depending on the size of the content you
chose to back up during step 2. Once the backup is created, you can find
it here.