IP address banning (Fail2Ban) is an automated way to protect your
server from brute force attacks. Fail2Ban uses regular expressions to
monitor log files for patterns corresponding to authentication failures,
seeking for exploits, and other entries that can be considered
suspicious. Such log entries are counted, and, when their number reaches
some predefined value, Fail2Ban either sends a notification email or
bans the attacker’s IP for a pre-defined length of time. When the ban
period is over, the IP address is automatically unbanned.
Fail2Ban logic is determined by a number of jails. A jail is a set of
rules covering an individual scenario. The settings of the jail
determine what is to be done once an attack is detected according to a
predefined filter (a set of one or more regular expressions for
monitoring the logs). For more information, see Fail2Ban Jails
Management.
In Plesk Obsidian, Fail2Ban is enabled by default: all available
jails are turned on and the default Fail2Ban settings are used.
In most cases, we recommend keeping them but you may want to adjust them
if necessary.
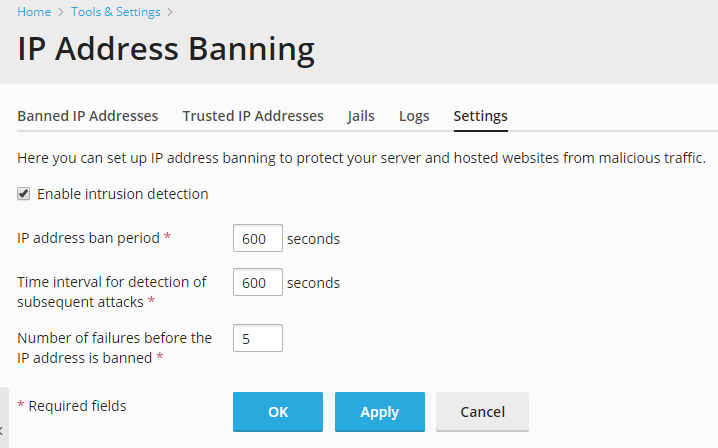
To change Fail2Ban settings:
- Go to Tools & Settings > IP Address Banning (Fail2Ban) (under “Security”).
- Go to the “Settings” tab. Here you can change:
-
IP address ban period – the time interval in seconds for which
an IP address is banned. When this period is over, the IP address
is automatically unbanned. -
Time interval for detection of subsequent attacks - the time
interval in seconds during which the system counts the number of
unsuccessful login attempts and other unwanted actions from an IP
address. -
Number of failures before the IP address is banned – the
number of failed login attempts from the IP address.
-
IP address ban period – the time interval in seconds for which
- Click OK.
Fail2Ban in Plesk has the following limitations and peculiarities:
- Fail2Ban protects against attackers with both IPv4 and IPv6 addresses.
- Fail2Ban relies solely on IPs (without hostname lookups) unless reconfigured.
- Fail2Ban cannot protect from distributed brute force attacks, since
it identifies intruders by their IP address. - If you have your Plesk installed on a VPS, the VPS iptables records
limit (numiptent) might affect the…