Question
How to install and enable nginx reverse proxy on a Plesk for Linux server?
Answer
After enabling nginx reverse proxy on a Plesk server, it will be used in combination with Apache. To learn more about how nginx reverse proxy works with Apache, visit the following Plesk documentation page:
-
Install the nginx reverse proxy component:
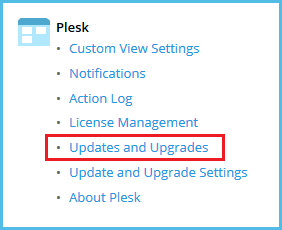
1.1. Log in to Plesk.
1.2. Go to Tools & Settings and click Updates and Upgrades.
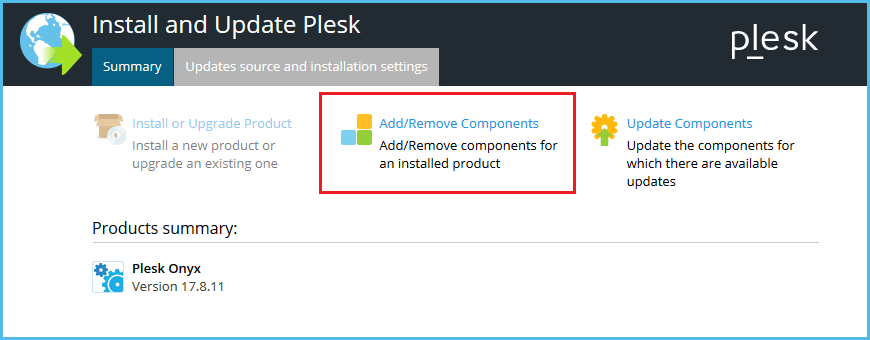
1.3. On the Updates and Upgrades page, click Add/Remove Components.
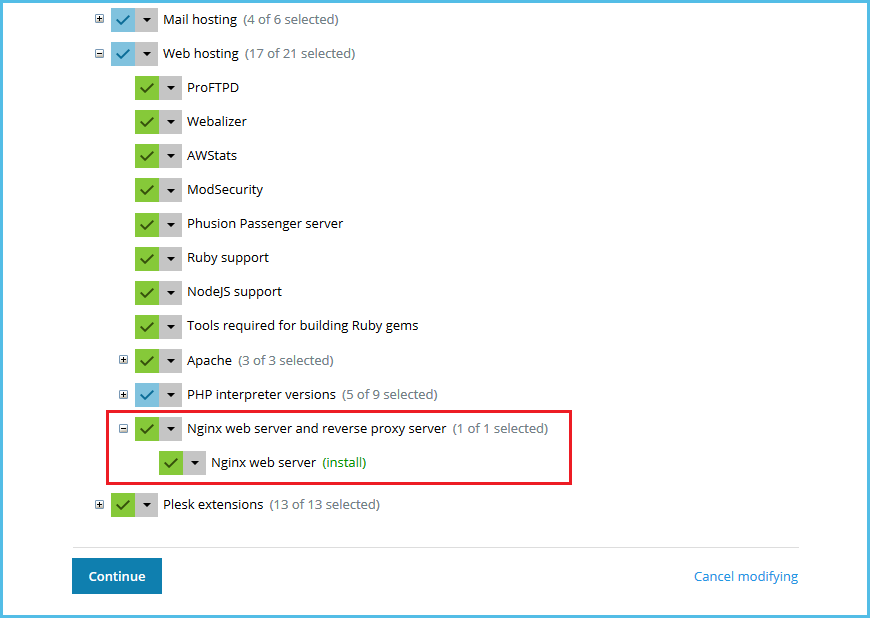
1.4. On the Add/Remove Components page, expand Web hosting and select Nginx web server for installation. Click Continue to begin the installation.
-
Once the component is installed, enable the nginx reverse proxy service in Plesk:
2.1. Go to Tools & Settings > Services Management.
2.2. Click the
 button next to Reverse Proxy Server (nginx) once and wait. The process will take some time to configure.
-
Connect to a Plesk server via SSH.
-
Install the nginx reverse proxy component using the following command:
# plesk installer --select-release-current --install-component nginx
-
Manage nginx reverse proxy:
-
To check the current status of nginx reverse proxy:
# /usr/local/psa/admin/sbin/nginxmng --status
-
To enable the nginx reverse proxy service, run:
# /usr/local/psa/admin/sbin/nginxmng --enable
-
To disable the nginx reverse proxy service, run:
# /usr/local/psa/admin/sbin/nginxmng --disable
Note: The start and stop operations for nginx reverse proxy listed above switch the nginx web-server configuration for all domains in Plesk. This might cause a website downtime for a short period of time.
-