Cloud companies like Linode are revolutionizing how businesses reach their customers today. Digitizing painful old processes, allowing them more time to focus on what they really care about – making their products unique. This is why we have Plesk on Linode. Now let’s talk about how to install Plesk on Linode too.
As a Web Professional, your goal is to provide highly available and scalable services to your customers. You want to be able to focus on what you’re good at. Forget the nitty-gritty technical server management, cost-streamlining, running of instances, backups, and account management. These tasks are for the virtual private server, designed precisely for this purpose. If you’re tired of managing infrastructure and security when you just want to focus on improving your product/service, Plesk Obsidian is the solution. Now for the infrastructure…
What’s Linode?
Linode is an Infrastructure-as-a-Service (IaaS) provider company based in New Jersey, US. Linode offers multiple products and services for its clients. Its flagship products are IaaS solutions with multiple VM sizes at different price points billed hourly.
Additionally, Linode Backup allows customers to back up their servers on a daily, weekly, or monthly basis. Linode Manager and NodeBalancer both allow users to manage multiple server instances across a single system.
Getting started with Plesk on Linode
First, please review the Software Requirements for Plesk to find what Linux distributions are supported by Plesk.
- Then, log into your Linode Account and click on “One-Click Apps”. If you don’t have one, you need to create one first.
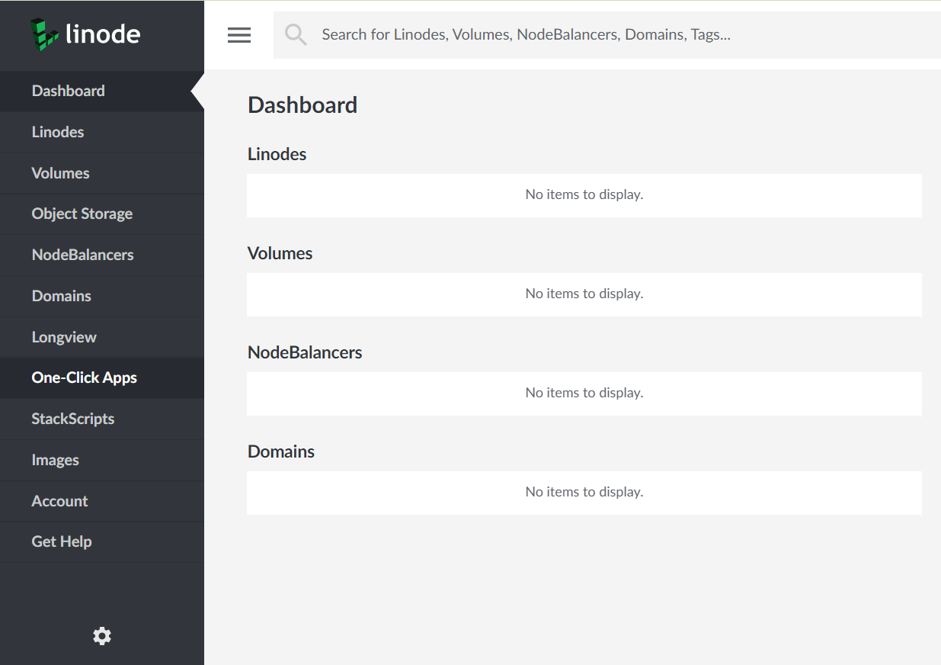
2. In the middle of the page, click on “Plesk”

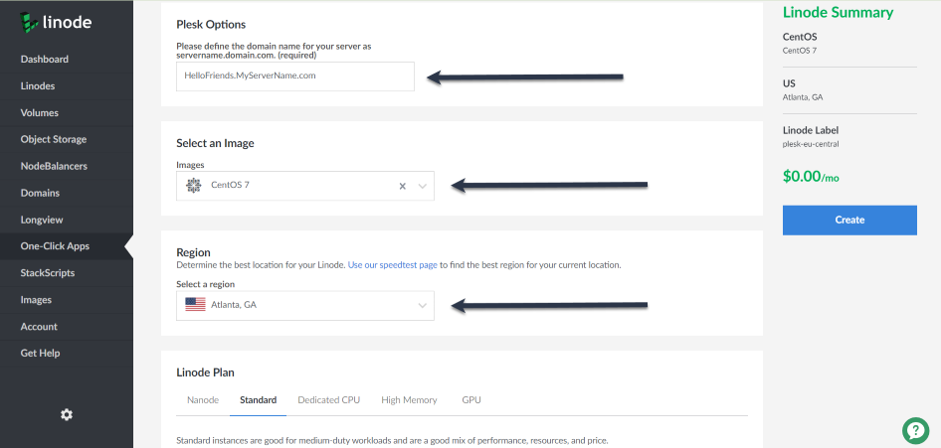
3. Then scroll down to choose some options based on your needs:
-
- You need to define a domain name for your server. This should be in the format yourserver.yourdomain.com . This is only going to be active after your point your DNS to the virtual machine but is a requirement for a successful deployment.
- Select an operating system of your choice. You can currently choose the latest CentOS and Ubuntu versions. Which one is best for you is a matter of choice and there are no limitations of Plesk independent of what you are going to use.
- Select a Region of your choice. Depending on where you or your customers’ websites are, select the datacenter region that you may need. Usually, it’s recommended to choose the closest location to where the majority of your website visitors are coming from to avoid any performance delays.
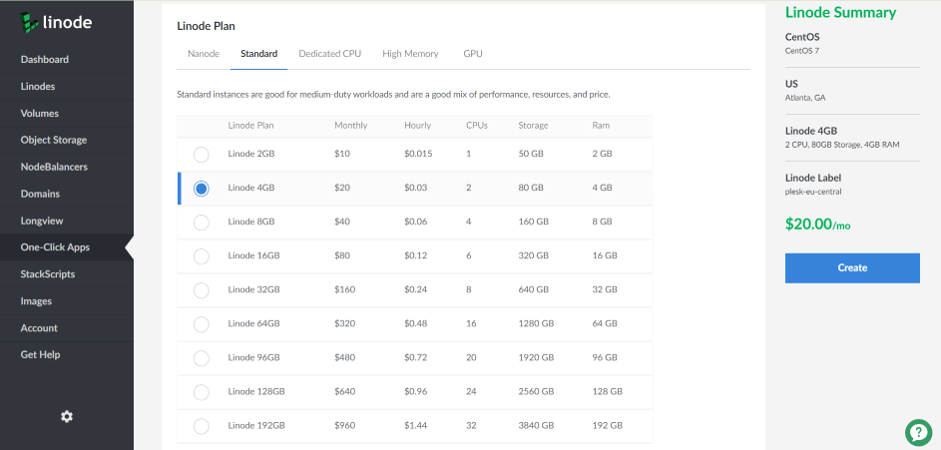
4. Afterwards, scroll down further and select the size of your virtual machine. Plesk runs smoothly on a small virtual machine. However, it highly depends on your setup and how many websites you plan to run on a single virtual machine. Please also refer to this guide for details.
5. Scroll down again and define further options. The Linode Label and “Add Tags” are optional things. Here, you’ll need to set a root password, which you will need to remember for later 😉
Further Optional Add-ons are optional and up to you whether to use them or not. Then click “Create” on the right side.

6. The Plesk Stack Script asks you to fill in basic information. Which will start the Plesk configuration, install a temporary license key and let you to login. All without needing an SSH to generate a password afterwards. Because you can define it upfront.
Leave all the other settings as default.
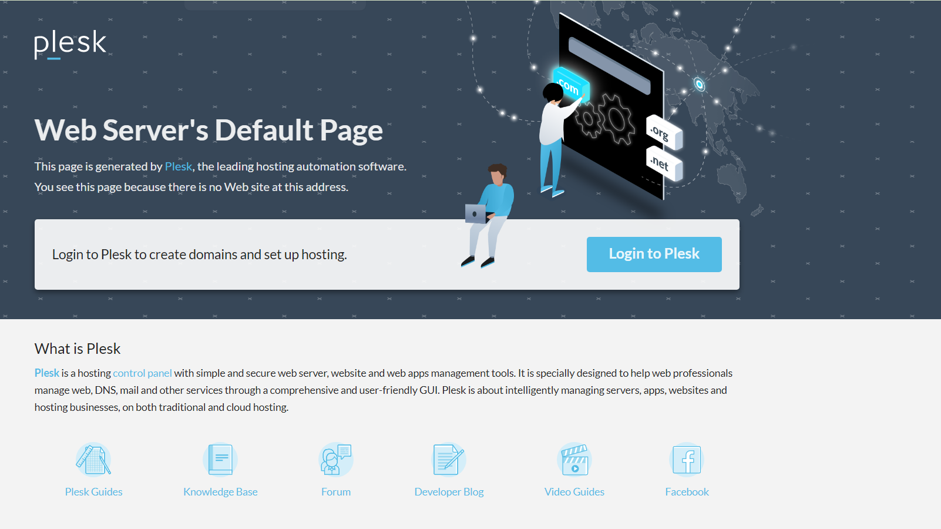
7. You should see this or a similar screen in your browser after you pressed enter in the browser. Click on “Login to Plesk”.
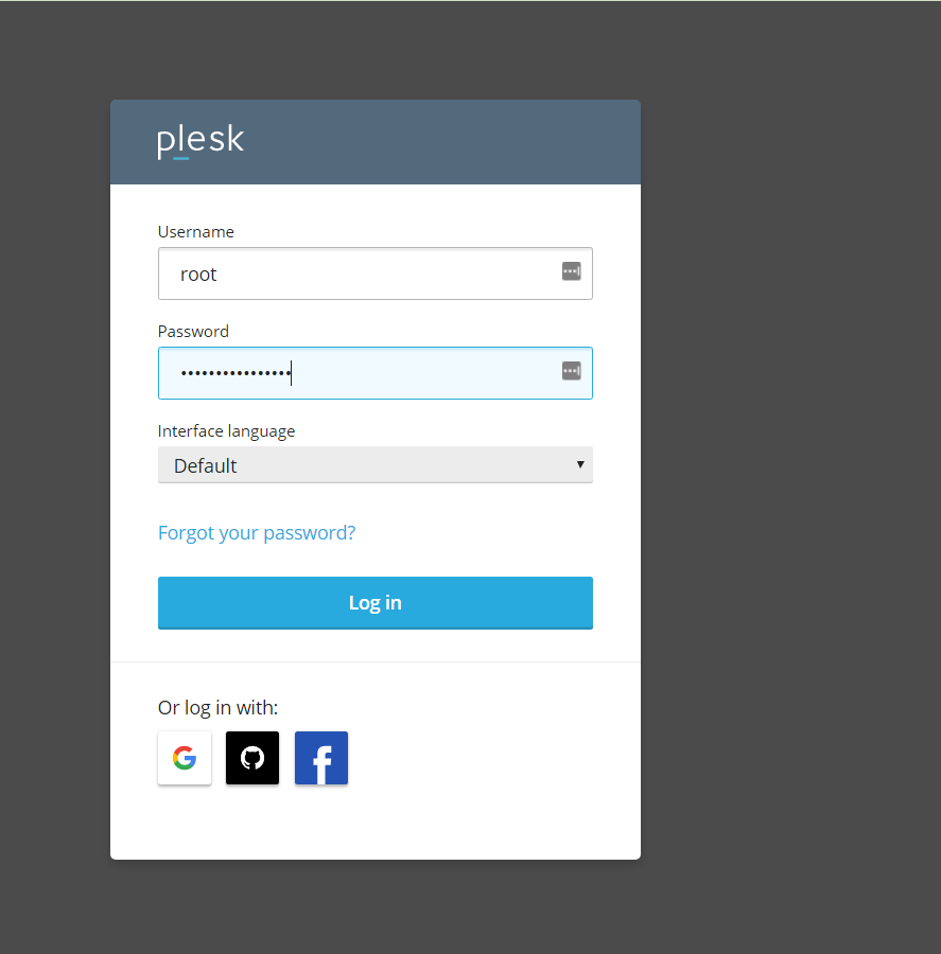
8. You can safely ignore the “insecure” message after you pressed “Login to Plesk”. The reason is that unless your chosen domain name for the server has no SSL certificate assigned, this message will stay. You can do this later for free using a Let’s Encrypt certificate inside the Plesk configuration.
Then use the user “root” as your username and the password that you defined inside the Linode interface earlier. Click “Log in”.
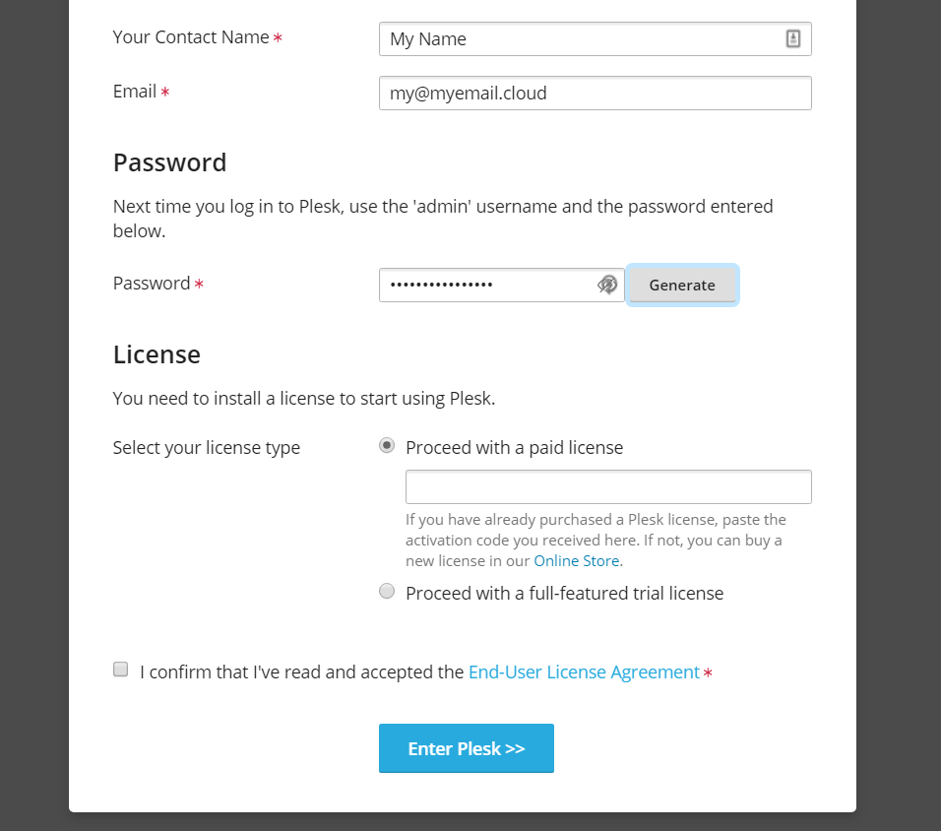
9. You can then enter a few more details to set up the server. And a password for the login with the “admin” username. You can then use that login to access Plesk instead of using root and the root-password. We highly recommend that if you’re accessing the virtual machine through the terminal, you only use the root access.
You can either use a trial license for Plesk or check out our Plesk licenses to enjoy its full capabilities.
Enter the activation code you receive in your Plesk order and “Enter Plesk”.
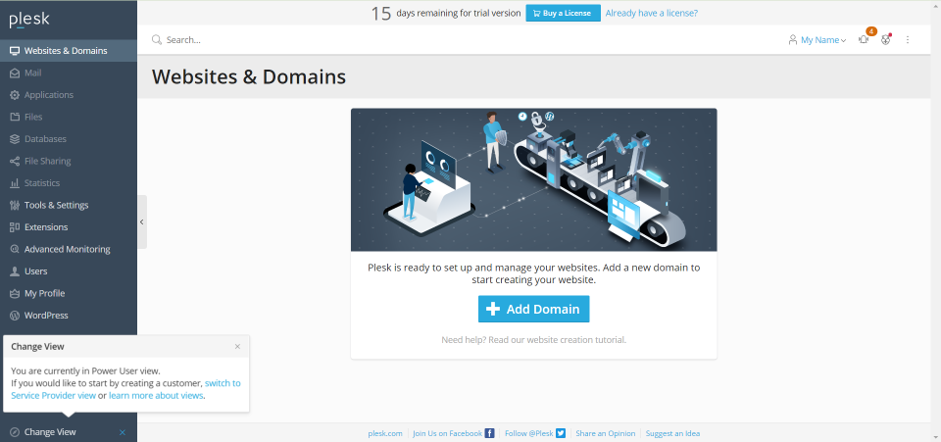
10. Welcome! After a few more seconds of initialization, you can now add your first domain and/or website. If you need more details, we also suggest checking out our documentation or Plesk University where we have free courses available.
Recently, we even launched a free Udemy course on how to get started with Plesk on Linode. So you can get your first website up and running in no time. In the meantime, we’re available if you need any additional support. Or if you want to be part of our growing Facebook Community Group. Give us a knock and we’ll let you in. Happy Plesking on Linode!

One comment
Additionally, Linode Backup allows customers to back up their servers on a daily, weekly, or monthly basis. Linode allow users to manage multiple server instances across a single system.