Cloud computing provides businesses the ability to quickly scale computing resources without the costly and laborious task of building data centres, and without the costs of running servers with idle capacity due to variable workloads. To simplify dynamic provisioning in the Cloud for infrastructure providers (including service providers who offer dedicated servers, VPS or IaaS), Plesk now provides ready-to-go images for deploying on Microsoft Windows Azure.
What is Windows Azure?
Quite simply, anything you want it to be.
This cloud platform from Microsoft provides a wide range of different services, to help you build, deploy, and manage solutions for almost any purpose you can imagine. In other words, Windows Azure is a world of unlimited possibilities. Whether you’re a large enterprise spanning several continents that needs to run server workloads, or a small business that wants a website with a global reach, Windows Azure provides a platform for building applications that can leverage the cloud to meet the needs of your business.
In addition to traditional cloud offerings, Azure offers services that leverage proprietary Microsoft technologies. For example, RemoteApp allows for the deployment of Windows programs using a virtual machine running Windows, OS X, Android, or iOS through a remote desktop connection. Azure also offers cloud-hosted versions of common Microsoft enterprise solutions, such as Active Directory and SQL Server.
Questions about Windows Azure?
There are two great places you can go online to ask questions about Windows Azure and get answers from the community:
The best way to keep up with new features and enhancements in Windows Azure is by following the official Windows Azure Blog. If you use a newsreader, you can subscribe to the RSS feed for this blog and get the news as it happens.
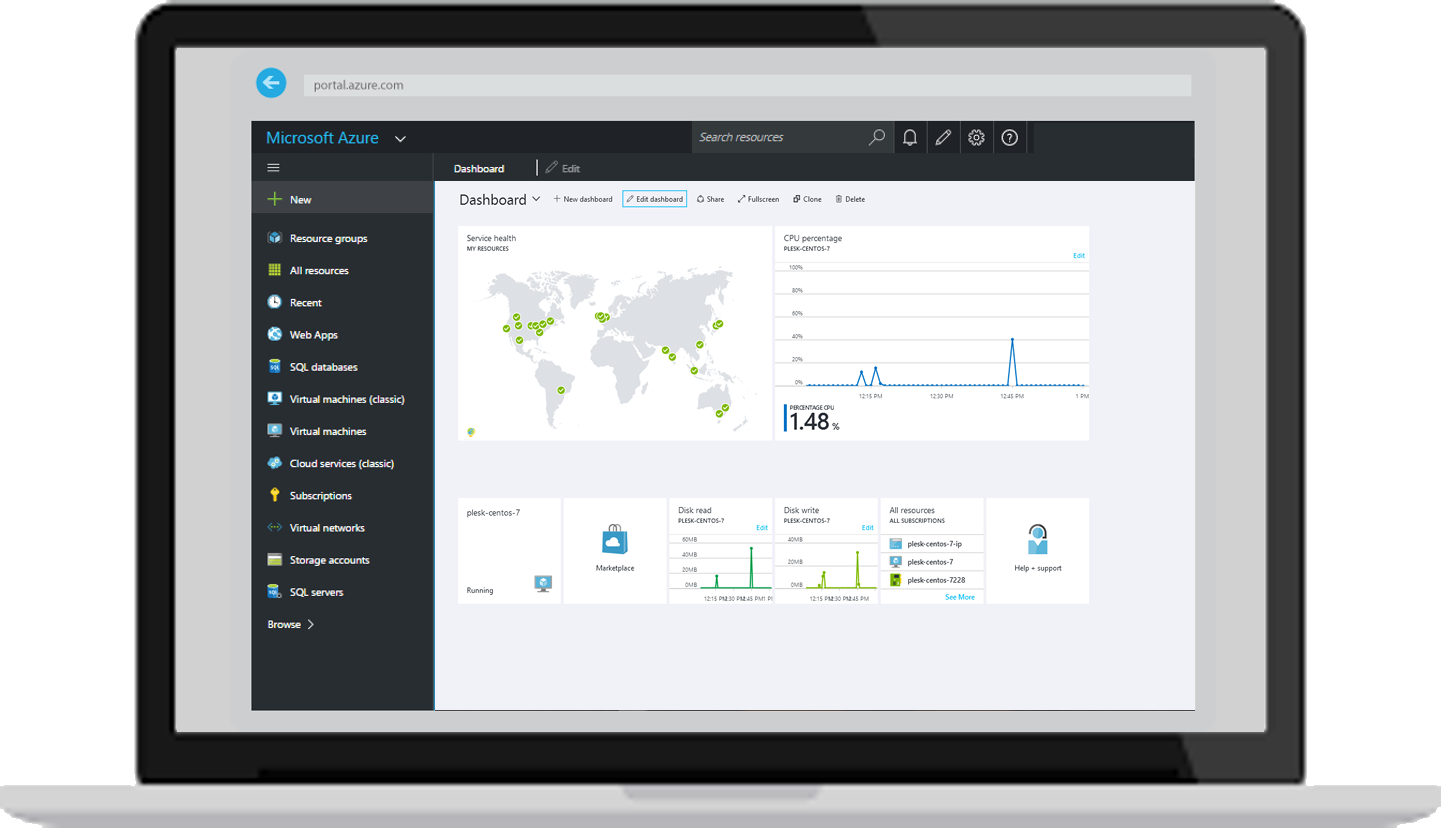
Image: Microsoft
What is Plesk Onyx?
It’s what Web Professionals like Developers, Designers, Agencies, IT-Admins use to simplify their work lives.
Plesk is the leading WebOps platform to build, secure and automate applications, websites and hosting businesses. Available in more than 32 languages across 140 countries in the world, 50% of the top 100 worldwide service providers are Plesk partners. Our WebOps platform is designed to help infrastructure providers create targeted solutions for Web Professionals, Web Hosts, and Hosting Service Providers.
Key solution areas include:
- Unlimited domains
- WP Toolkit
- Developer Pack
- Subscription Management
- Account Management
- Reseller Management
The new Plesk Onyx for Windows and Linux (WebHost) also includes a tightly integrated set of mass-management and security tools that can be used to protect and automate WordPress. All Plesk-powered systems come with built-in server-to-site security, promising more reliable infrastructure and reduced support costs.
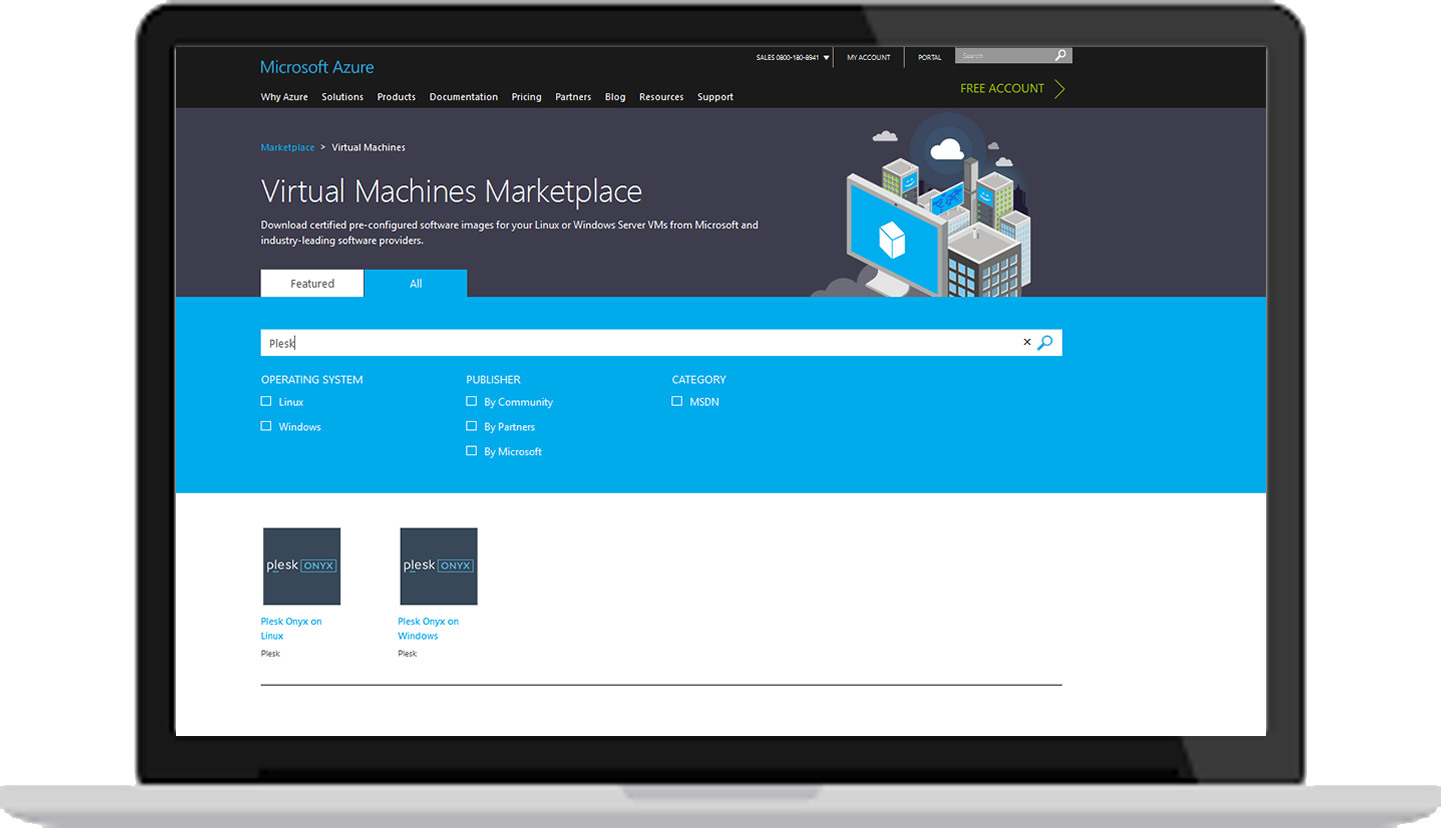
Image: Microsoft
Here’s the good news: Plesk Onyx now runs on Microsoft’s cloud infrastructure to provide the scalability, security, and performance that customers depend on.
Better news yet, Plesk provides a variety of virtual machine images with the most popular configurations. So no actual installation is required. You’ll just need to create a virtual machine from the appropriate image. All available images for virtual machines can be found in the Microsoft Azure Marketplace.
Which virtual machine images are provided?
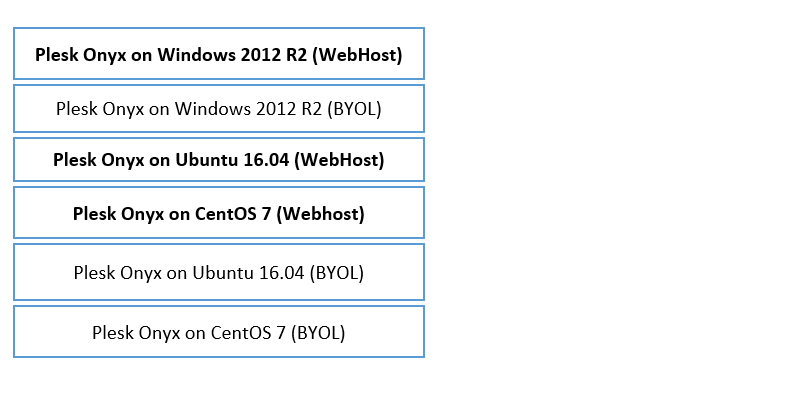
The new Plesk Onyx images are shipped in three editions and are available for both Windows and Linux.
The ‘Bring Your Own License’ (BYOL) instance of Plesk Onyx allows you to purchase your own license directly from the Plesk Online Store or from a Plesk reseller. For Plesk Onyx WebHost images, the cost of your license is included in the hourly charge for the instance. Plesk Onyx licenses are available for two platform types: for Dedicated Servers and for VPS.
License and OS version:
Now that you’re familiar with the Windows Azure platform and Plesk, you’re ready to take the next steps. And there’s no better way to experience the powerful capabilities of Windows Azure than trying out the platform for yourself.
Getting started with Plesk and Windows Azure
Microsoft is currently offering a free one-month trial of Windows Azure that provides you with $200 of Windows Azure credits you can use for whatever you want. You get full access to the platform with no strings attached. Just sign in with your Microsoft account and fill out the form.
Tutorials
These tutorials by Cynthia Nottingham, Technical Writer at Microsoft, shows you how easy it is to create a Windows virtual machine (VM) from a Plesk-published image by using the Azure portal.
Quick Start Guide: Create a virtual machine
Log into the Azure Portal and on your Dashboard, select New> Compute. Search for the Plesk virtual machine images and select the appropriate Plesk configuration.
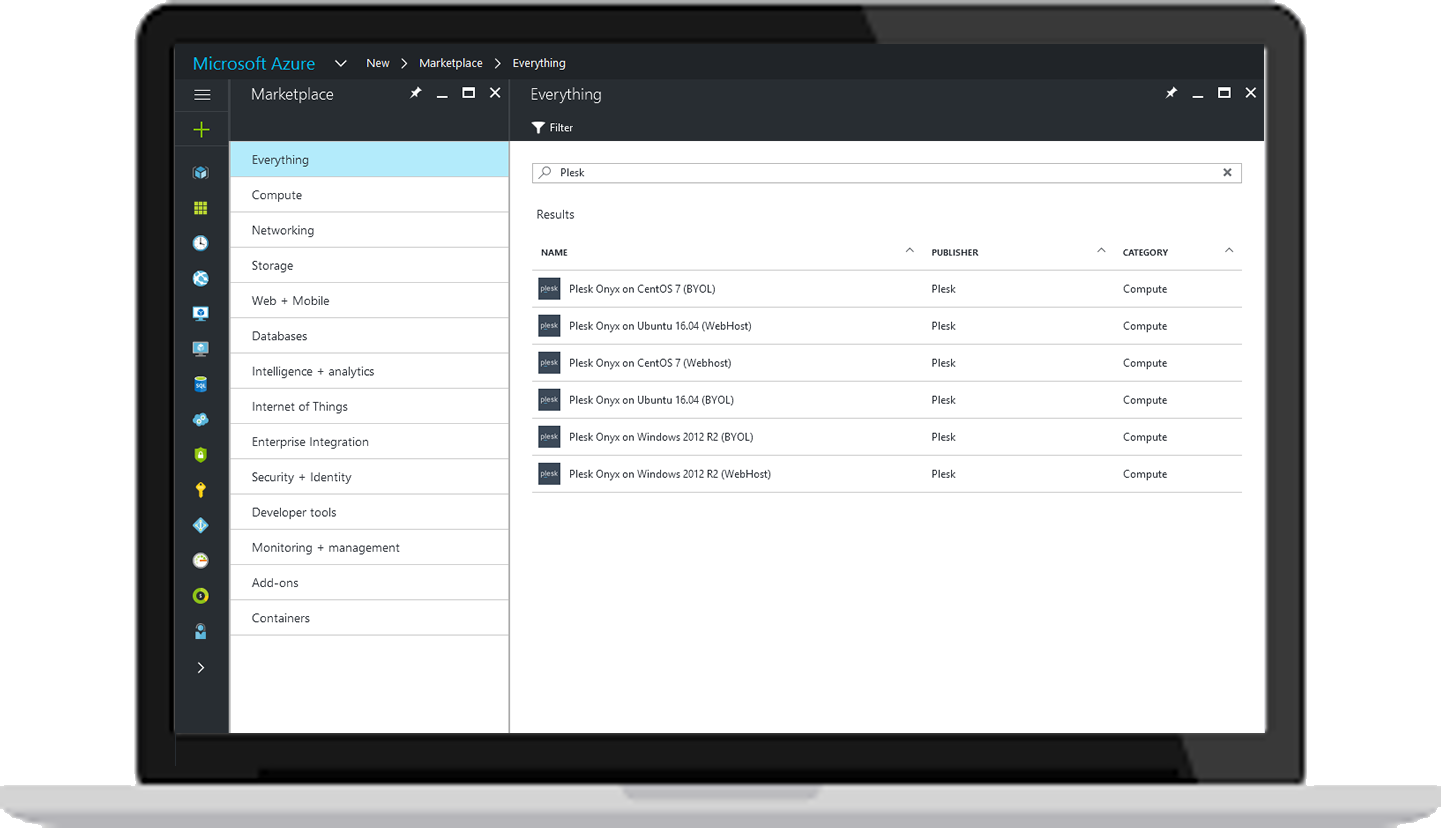
Image: Microsoft
When configuring a virtual machine, you will be asked to specify the following settings:
1. Basic settings: virtual machine name, disk type (SSD or HD), username and password, your Azure subscription and resource group.
Note: The root username cannot be used during the VM creation. You may grant the root user access to the VM later from the console.
For Linux VM, you can choose the following authentication types:
- SSH public key. In this case, you should specify your SSH public key. You can find information about creating public and private SSH keys here.
- Password. In this case, you should specify and confirm the password that will be used for connection to the virtual machine.
2. VM size. You can choose one of available standard sizes provided by Azure.
3. Storage and network settings, including virtual network, subnet, public IP address, network security group (firewall). It is OK to leave the default values for most options.
Note: By default, your machine will have a dynamic IP address, so that the IP address will be changed each time when the virtual machine is restarted. If you want to avoid this, click Public IP address and then select the Static option. The virtual machine will be created with a static IP address.
4. Deployment. When you’ve dialed in all the settings, you’ll be presented with a summary. Confirm these settings for your new VM and click OK. Finally, your offer details will be generated and you can now purchase your virtual machine by clicking the Purchase button. The deployment process will start, and you will see its progress on your Dashboard.
5. You’ve created a VM. Your new VM will deploy in a couple of minutes. Once your virtual machine is deployed, it will be automatically started and the setting page will be displayed. You also can view and manage your virtual machine settings by going to Virtual Machines and selecting your virtual machine name.
Of course, you will be able to see the Public IP address of the machine.
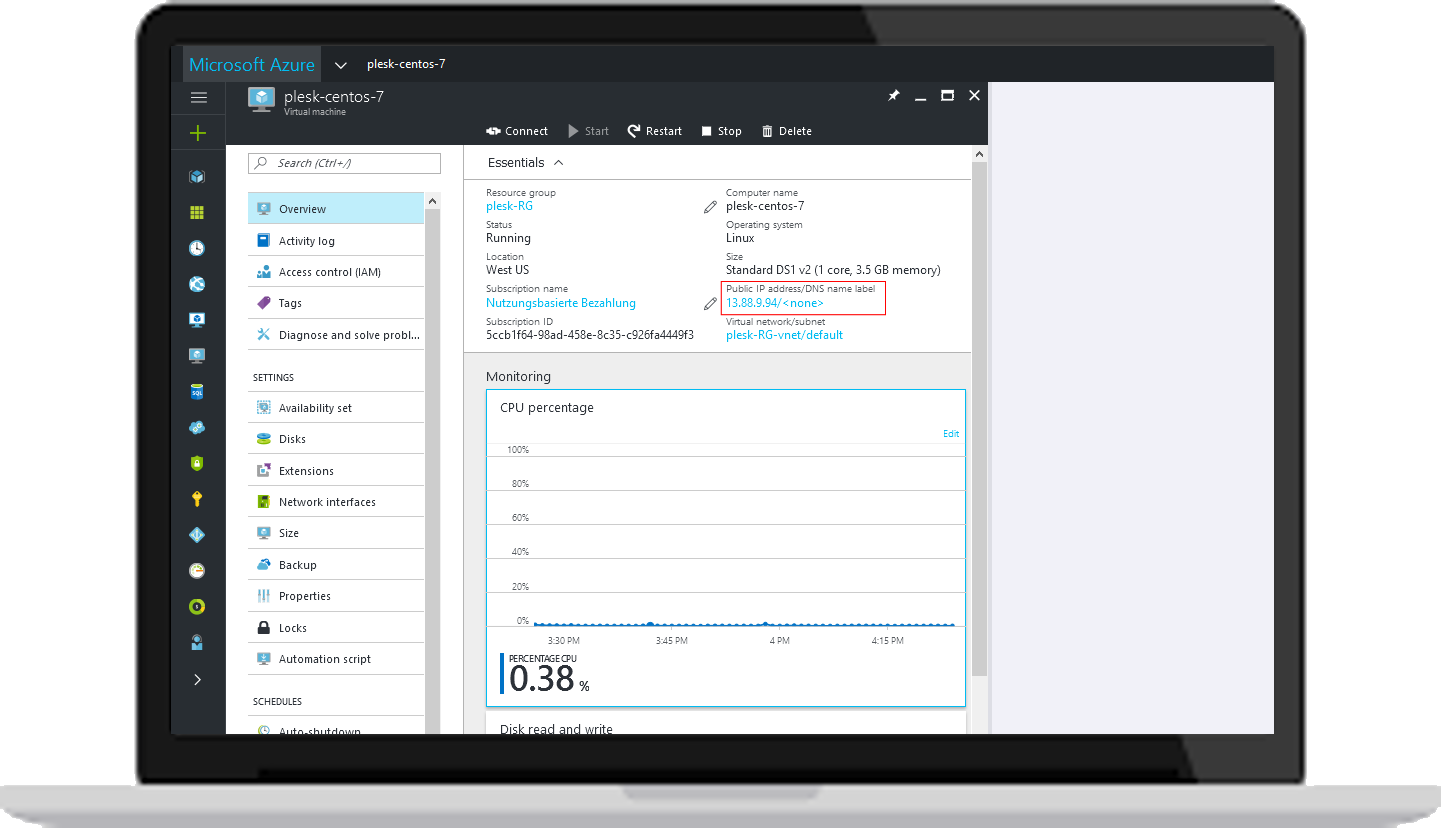
Image: Microsoft
Access Plesk Onyx on your virtual machine
Connect to the virtual machine.
-
If you’ve created a Windows Virtual Machine, you can connect to it via Remote Desktop. Go to the Azure Portal Dashboard >Virtual Machines, choose your VM, and click Connect. This will create and download a Remote Desktop Protocol file (.rdp file) that acts like a shortcut to connect to your machine. Open this file and connect to your virtual machine using your login and password.
-
If you have a Linux VM, you can SSH into its public IP address that is displayed in the virtual machine’s settings. Depending on your selected authentication type, you may either use a login and password, or your SSH public key.
-
From a Mac or Linux workstation, you can SSH directly from the Terminal. For example:
ssh -i ~/.ssh/azure_id_rsa [email protected]. -
If you are on a Windows workstation, then you will need to use PuTTY, MobaXTerm or Cygwin to SSH to Linux. For details, see How to Use SSH keys with Windows on Azure.
Get a one-time login for logging in to Plesk
-
On the virtual machine, run
$ sudo plesk loginto get a one-time login for logging in to Plesk. You will receive two links: based on the virtual machine name and based on the IP address. Use the link based on the IP address to log in to Plesk.
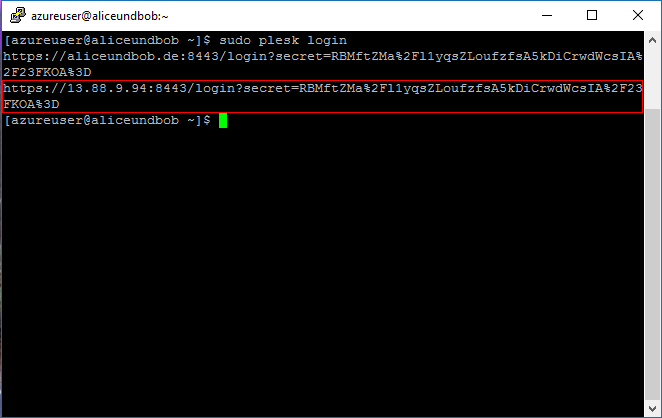
Note: You cannot use the link based on the virtual machine name the first time you log in because Plesk has not passed the initial configuration and the full hostname has not been created yet. You should use the link corresponding to your public IP address.
Running the Installation/Configuration wizard
1. When you log into Plesk, you will see the View Selector page. On this page, you can choose the appearance of the panel as per your requirements.
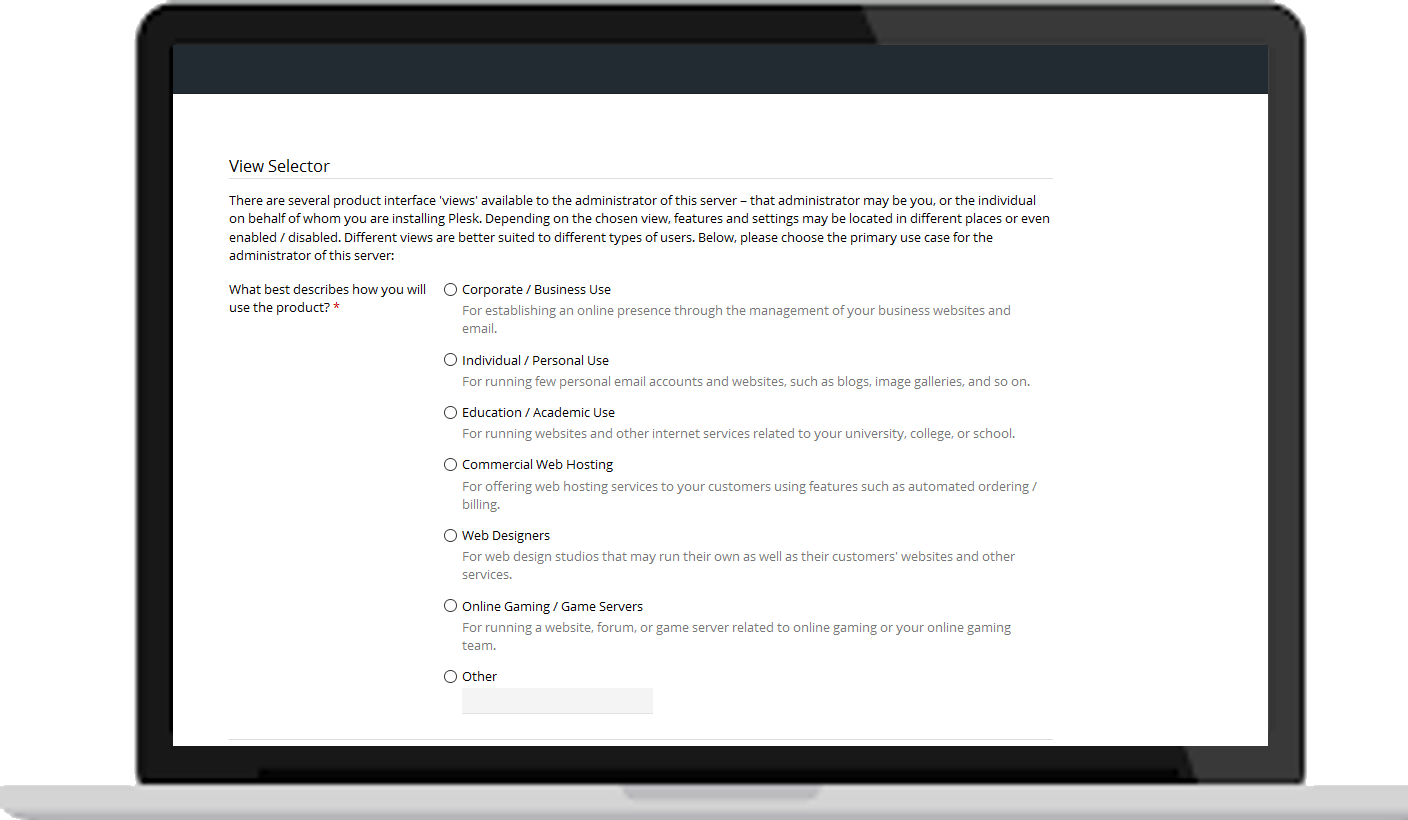
Image: Plesk Onyx
Once your purpose has been identified, a second drop-down menu will emerge asking you select your preferred layout. This can be changed later.
2. Then comes the Settings page. Here you need to fill in your hostname, IP configuration, and admin password.
- New hostname: Fill in your primary domain (i.e. testdomain.com).
- Default IP Address: Leave the IP as default.
- New password: Change the default administrator password.
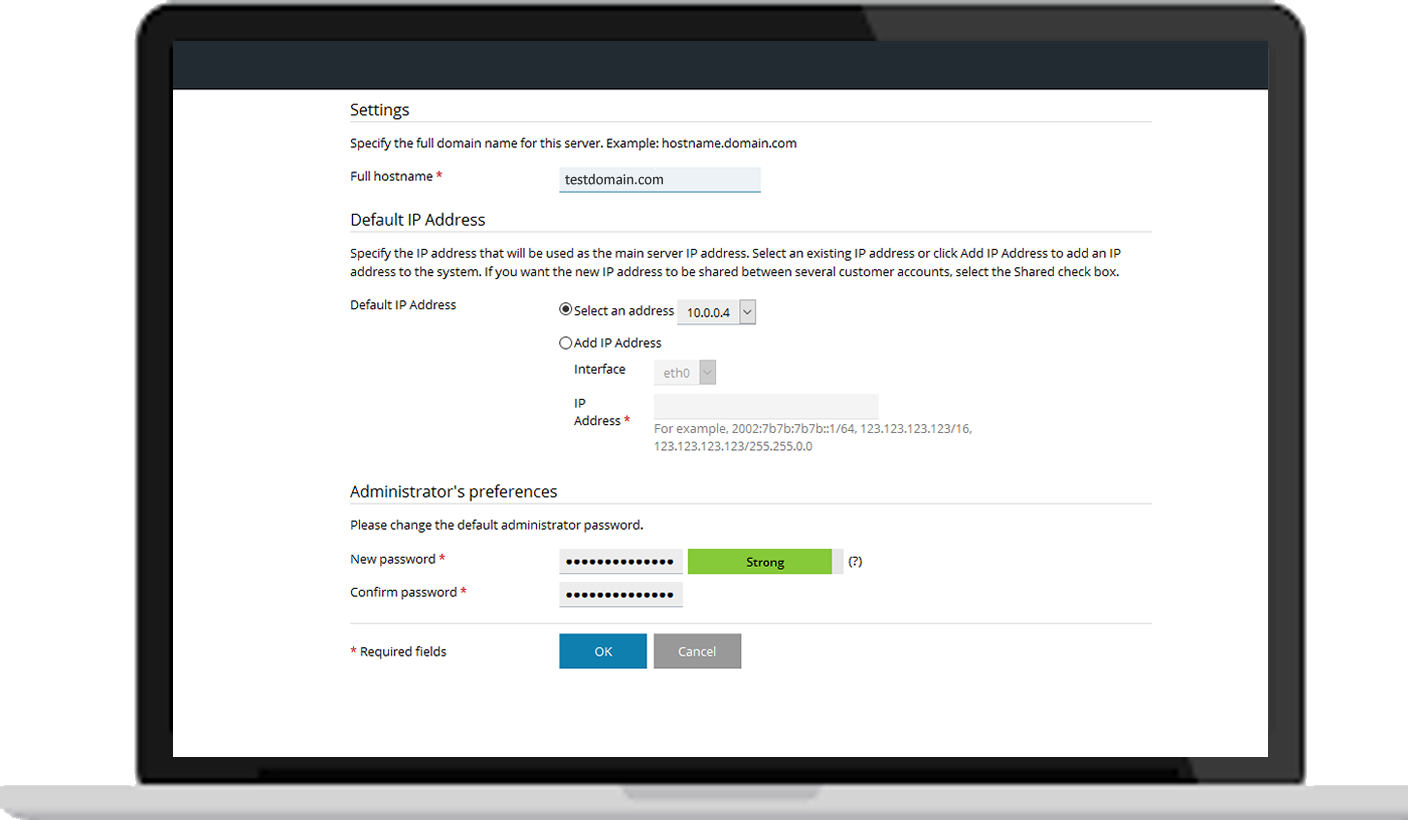
Image: Plesk Onyx
3. Next is the Administrator information page. Just fill in the information asked and proceed to the next page.
4. Then comes the License key install page. Your Microsoft Azure instance is billed on an hourly basis, starting when it boots up and ending with the instance termination.
- If you have a Bring Your Own License (BYOL) Plesk Onyx image, your hourly charge for the Microsoft Azure instance will be lower but you need to purchase and install the Plesk product license yourself. You can order, retrieve and install a 14-day full-featured trial license from this page. Since you have already purchased a license key, proceeding with installing the license key.
- If you have a non-BYOL Plesk Onyx image, for example, Plesk Onyx on Windows 2012 R2 (WebHost), the cost of the license will be included in the hourly charge for the instance.
5. On the Create your Webspace page you can specify the domain name of your first subscription, and system user account username and password that you will use to manage it. This will create a subscription for hosting multiple sites.
6. Woohoo! Plesk is now configured!
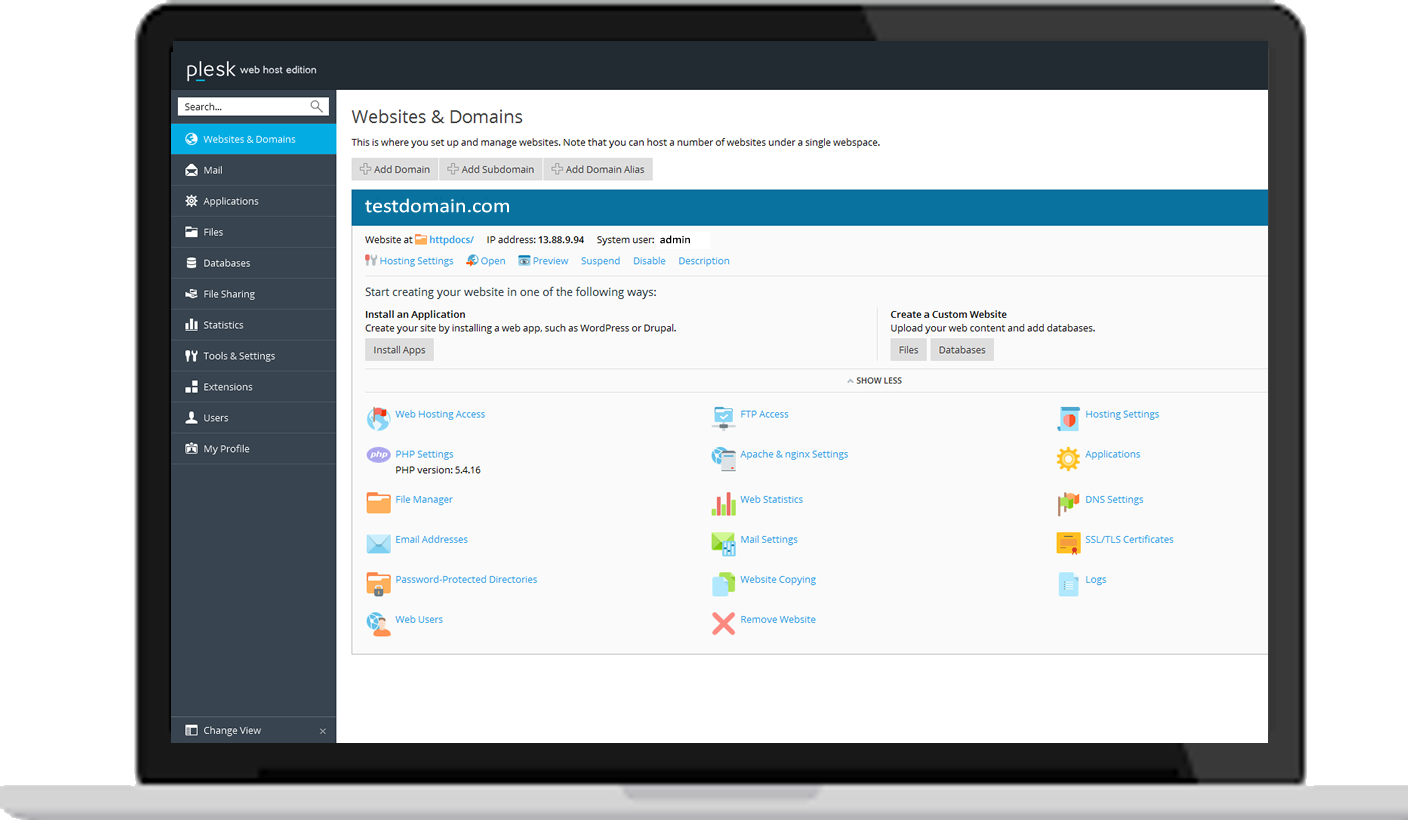
Image: Plesk Onyx
Thanks to the Microsoft Windows Azure team for co-authoring the introduction to this article and for providing feedback and technical insights on Windows Azure.
Be well, do good, and stay Plesky!

13 Comments
I am trying to deploy Plesk Onyx in Azure using a BizSparks account, but I am not being able to do so. Is there a limitation for BizSpark subscriptions?
Marcos, i think it is a Microsoft’s restriction on paid software. As you know we have our own msdn subscription (i think that bizspark program has similar restrictions) and it shows warning that licensed images can’t be paid by free monthly msdn credits. But, you should be able to buy a BYOL image from your subscription. Cheers, Jörg
msdn
How deploy Plesk Onyx on Microsoft Windows 2012 R2 64bits con IIS?
Hello thanks for writing this. Once the VM is deployed and we need to configure Plesk, it wasn’t obvious to me how to log in to Plesk on Windows Server 2012 when using the Server 2012 deployment model. After some investigation, I managed to find the following, two commands that can be executed from a command line on a Windows Server to allow you to configure Plesk, and set the initial password.
plesk login
plesk bin admin –get-login-link
I ran these in powershell, so I could copy the login link the second command creates.
Sharing in case anyone else is wondering how to log in for the first time on Windows Server.
Any roadmaps of when this will be available in Azure Stack?
Deploy Azure Stack, then log in to your Azure Stack Development Kit. Click More Services> Marketplace Management> Add from Azure. Locate the Plesk image you would like to install and click Download.
Inspirational content, have achieved a good knowledge of the above content on Windows Azure useful for all the aspirants of Windows Azure.
Great content useful for all the candidates of Windows Azure Training who want to kick start these career in Windows Azure Training field.
I’m currently running the CentOS 7 version and I can’t figure out what the thoughts are behind patching and updating this OS. Could you tell me a little more?
Hello Team
Im using Plesk Windows WordPress + Webhosting Platform from microsoft Azure ( Plesk on Windows 2019 (Webhost)
Im paying both MS and Plesk on a hourly basis . would i be eligible for licences and support.
is there anything additional that we have to do
Hey Hari,
You should be able to get support using your license key > More details from sales.
Get a one-time login for logging in to Plesk Issue:
I can get the link with my IP address, but I get a browser privacy error.
“You cannot visit nifty-herschel.IPADDRESS.plesk.page right now because the website uses HSTS. Network errors and attacks are usually temporary, so this page will probably work later.”
I have tried multiple browsers and decreased privacy settings, but no luck. Is there any other way to log in for the first time?
Thanks!
Hi TJ, could you please redirect your question to the support team and open a ticket for investigation? Here: https://support.plesk.com/hc/en-us/requests/new Our tech team will be able to help you and provide more information. Thanks!