Plesk

Laravel Application Hosting in Plesk

Laravel Toolkit

Why the long face? Having trouble with Laravel? You’re in luck because hosting Laravel applications with Plesk becomes easy as pie! Read on to learn all about it.

  • Install Your Laravel application
  • Configure Your Laravel Application
  • Manage Your Laravel Application
  • Troubleshoot Your Laravel Application
  • Deploy Your Laravel Application
  • Are we missing anything? Let us know!

To save your time for things that matter, we came up with the Laravel Toolkit, a Plesk extension that makes hosting Laravel applications a breeze. So, what can it do?

  • Create a simple Laravel application with just a few clicks.
  • No need to install anything else. Get required PHP versions, Composer, Artisan, npm, MySQL database, and Git with one click.
  • No SSH access? No problem! Manage your applications from the Plesk interface. Run Artisan, npm, and Composer commands, manage the .env file and database, review logs – it’s that easy!
  • Pull updates for your Laravel applications from remote Git repositories and configure deployment options.
  • Get your application up and running, hosted, and secured with SSL with no hassle – Plesk takes care of everything.

Caught your interest? Let me give you a guided tour and walk you through the process of creating your first Laravel application in Plesk.

Install Your Laravel application

First, create a new domain in Plesk by clicking the ‘Add Domain‘ button and then selecting ‘Laravel site’ from the list of available options.

Install Your Laravel application​
Don’t worry if you don’t have a domain name for the website yet. For now, you can use a temporary domain name, courtesy of Plesk.
Once the website has been created, Plesk will ask you to choose between installing a default skeleton Laravel application and pulling the application from a remote Git repository. For now, let’s install the skeleton to see the Laravel Toolkit features.
Wait a little bit…
…and it’s ready!
Your first Laravel application is already available on the web! Hooray!

Configure Your Laravel Application

If you gave a mouse a Laravel application, it would ask for a database… or so we suppose. Anyway, let’s carry on and add one for your application.

  1. First, on the Laravel ‘Information‘ dashboard, click the ‘Manage domain‘ button. This will take you to the ‘Hosting‘ dashboard.
  2. Once there, click ‘Databases‘, and then ‘Add Database‘.

Once the database is created, you need to update the Laravel application configuration file with the information on how to connect to the created database.

  1. On the ‘Hosting‘ dashboard, click the ‘Manage Laravel Application‘ button. This will take you to the Laravel card.
  2. Once there, open the .env file and add the database credentials.

The last step: run the ‘artisan migrate‘ command to create a database.
And yes, you can run the ‘artisan‘ utility straight from the Plesk interface. Switch to the ‘Artisan‘ tab, and then choose the ‘migrate‘ command from the list of preloaded commands.

Manage Your Laravel Application

But wait, there’s more! Specifically, let’s take a look at a few more features that save your time when hosting Laravel applications.

It is worth mentioning that you can quickly call ‘composer‘ and ‘npm‘ commands by simply choosing them from the list of preloaded commands (which I found to be indispensable):

If your Laravel application uses Laravel Task Scheduling, so besides the usual ‘artisan schedule:list‘ command, you can quickly review all scheduled jobs on a separate tab.

Troubleshoot Your Laravel Application

If you configured your application to write its log to a separate file (‘single‘ mode), you can easily access it with using the Plesk Log Browser (click the ‘Logs‘ button on the Laravel ‘Information‘ dashboard).

Deploy Your Laravel Application

You can easily deploy and update your Laravel application from a remote Git repository.
To do so, switch to the ‘Deployment‘ tab, and then click the ‘Update‘ button. This will pull the latest changes from the repository, and also install the required Composer dependencies.

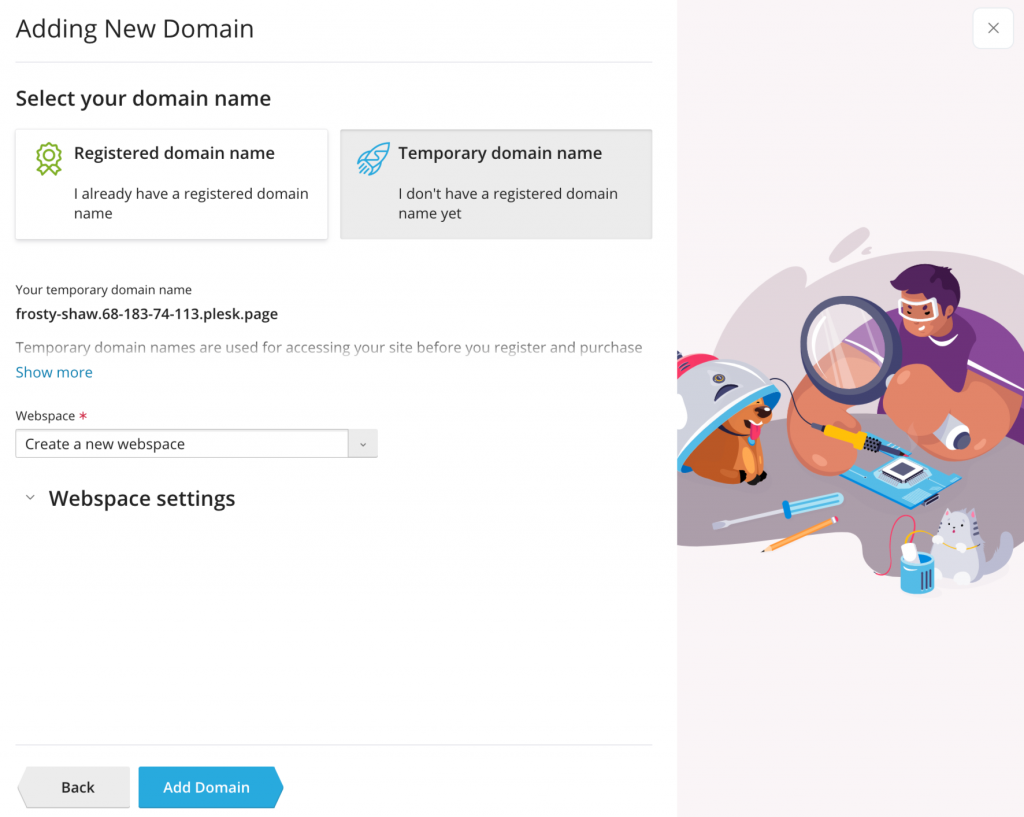
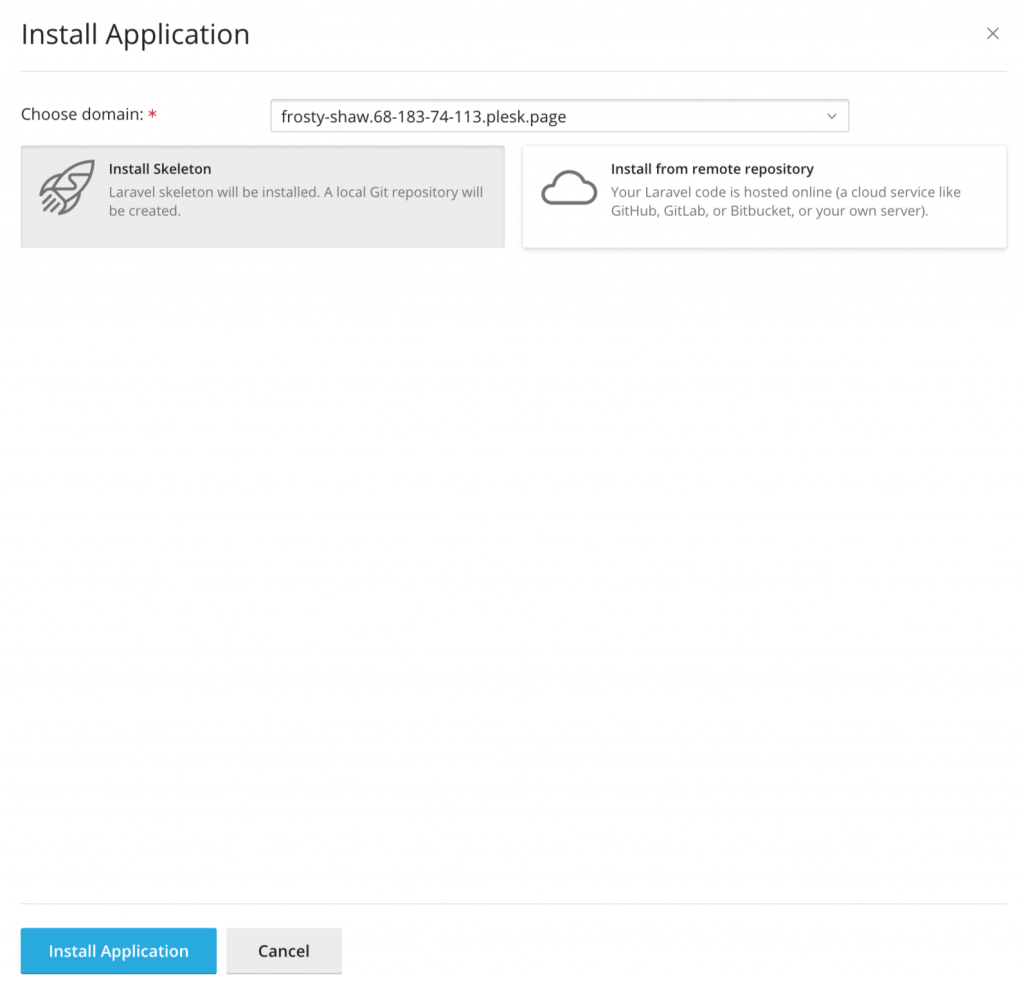
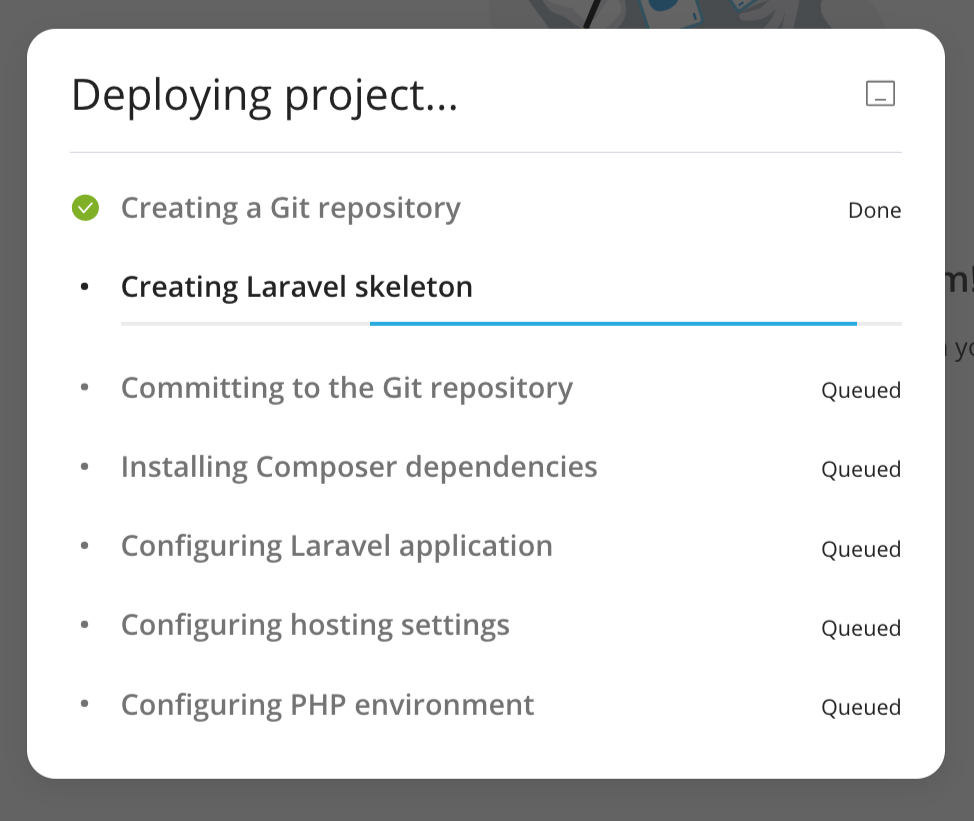
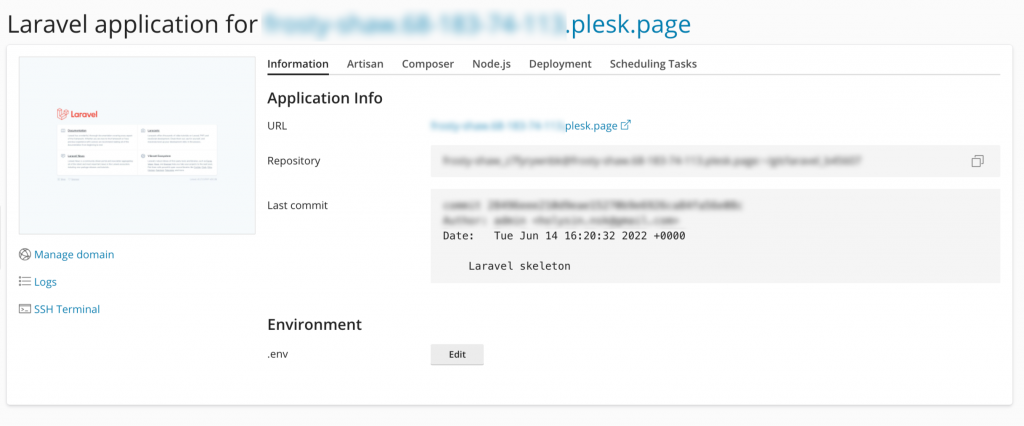
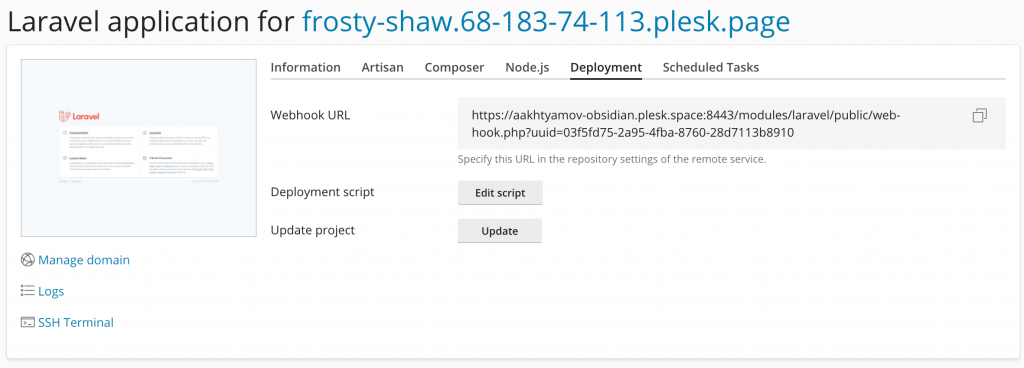
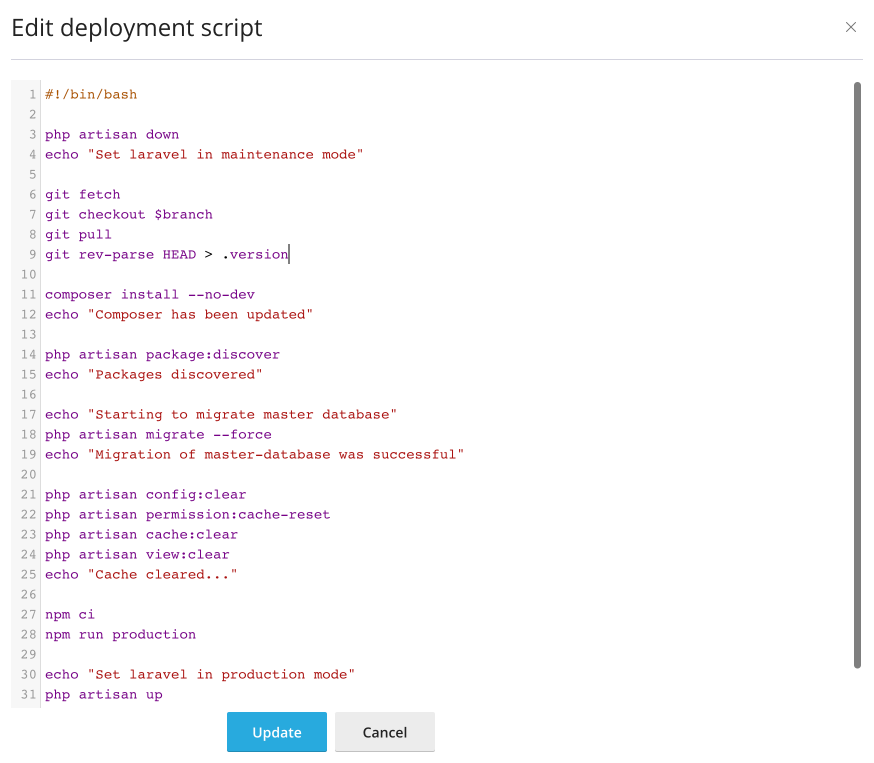
Such a workflow might not be everyone’s first choice, however. What if you need to specify a custom deployment process for the application? Well, as long as you have SSH access, you can add your own deployment script that will be run every time the application is updated.

Are we missing anything? Let us know!

That’s all for today, and I hope you’re as excited to try Laravel Toolkit as I was to present it!
This year, we continued improving the Node.js hosting application, released the brand new Laravel Toolkit, and right now we are working on adding support for .NET applications in Plesk for Linux.
How are we doing? We’re always happy to hear your feedback at feedback@plesk.com or in the comments section below.

Stay healthy, and ciao!