Question
How to use DNS with Plesk server?
Answer
DNS settings can be controlled by Plesk or by the Domain Registrar or External DNS provider:
Click on a section to expand
DNS configuration managed by Plesk
Purpose
Easy and all in one DNS management for all domains.
How to configure
For this way, DNS Server should be installed in Plesk Installer. If it is not installed, add the DNS Server component to Plesk configuration. Open UDP port 53 in the firewall and in external firewall, if applicable. Log into Plesk and find your Name Servers in Plesk > Domains > example.com > DNS Settings, take the "value" for the record type "NS".
Then, it is required to change Name Server for your domain at your domain registrar's account.
Here is an example for IONOS (formerly 1&1):
-
Log in to Plesk
-
Go to Websites & Domains > <domain_name> > Hosting & DNS > DNS Settings in Dynamic List view or Domains > <domain_name> > DNS Settings in other views
-
Locate two glue records. They have the following pattern:
ns1.<domain_name>   <the Plesk server IP address>
ns2.<domain_name>   <the Plesk server IP address>
Copy the NS records’ hostnames (
ns1.<domain_name>andns2.<domain_name>) and the server IP address as these will be needed in next steps.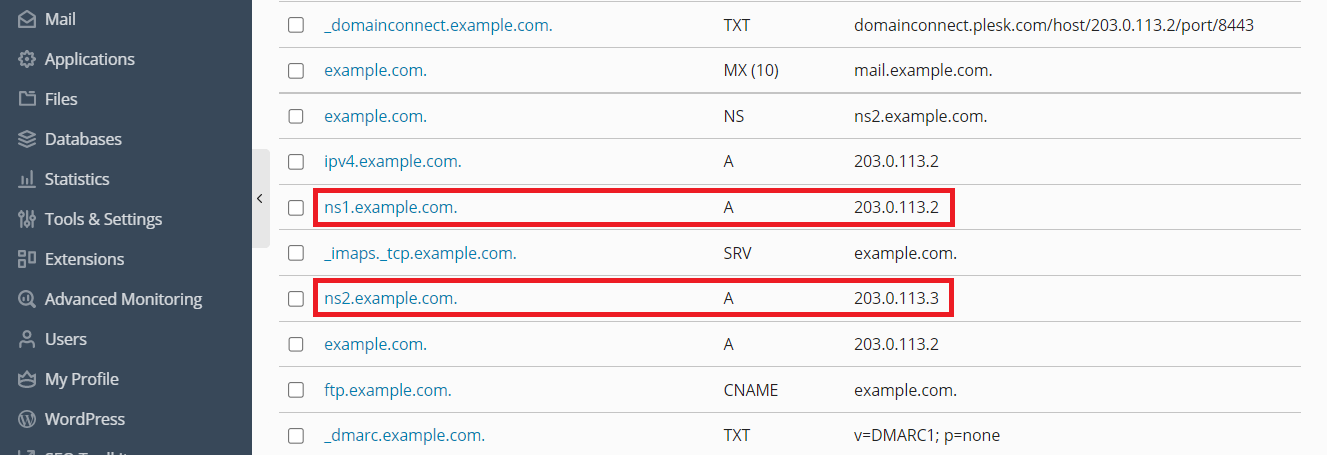
-
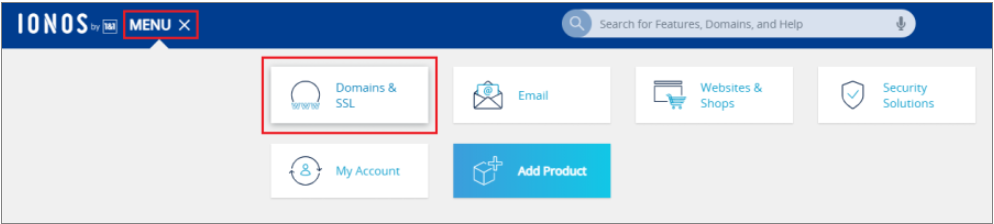
At the top, click MENU > Domains & SSL.
-
Next to your domain, click the

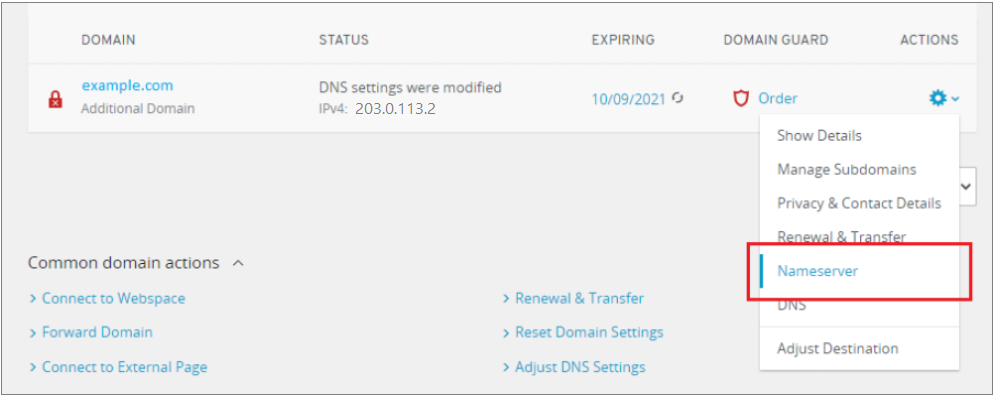
-
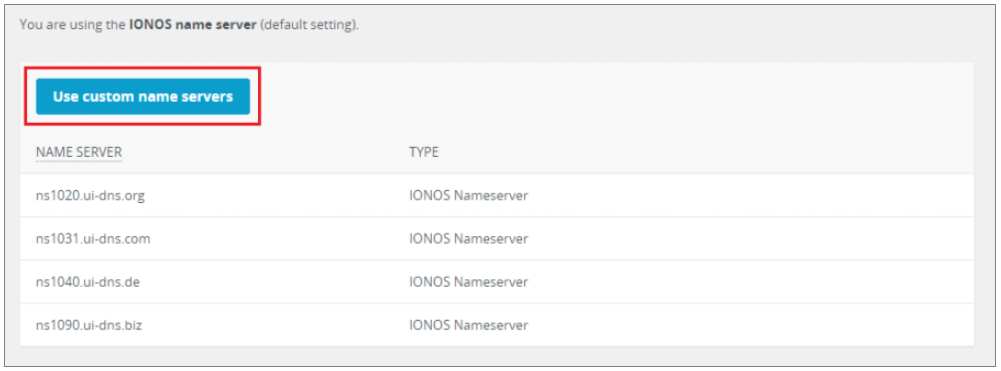
Click Use custom name servers.
-
Specify two nameservers (
ns1.<domain_name>andns2.<domain_name>), the Plesk IP address, and then click Save. The fields for IP addresses will appear once you specify the nameservers.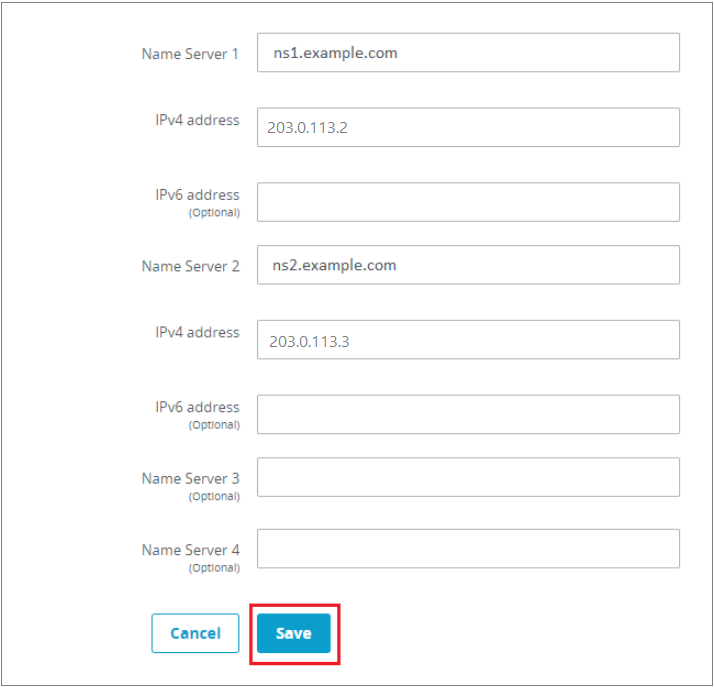

Note: Plesk is now configured as the primary DNS server and once propagation which can take up to 48 hours, completed, changes come into effect.
Instructions for other domain registrars
A problem that some domain registrars require two NS server with different IP addresses may be experienced. To solve this, there are different solutions available:
- Allocate an additional IP address from the Hosting Provider and add it to Plesk. Then use it as an additional Name Server in domains DNS Settings.
Example: ns1.example.com 203.0.113.2 ns2.example.com 203.0.113.3 - Setup a slave DNS server on additional hosting and connect it to Plesk as a Slave DNS server using the extension.
- Use one of the following 3rd-party extensions that allow adding DNS zones: Microsoft Azure DNS, DigitalOcean DNS, Amazon Route 53
The default DNS records can be reviewed in Plesk > Domains > example.com > DNS Settings, for example:
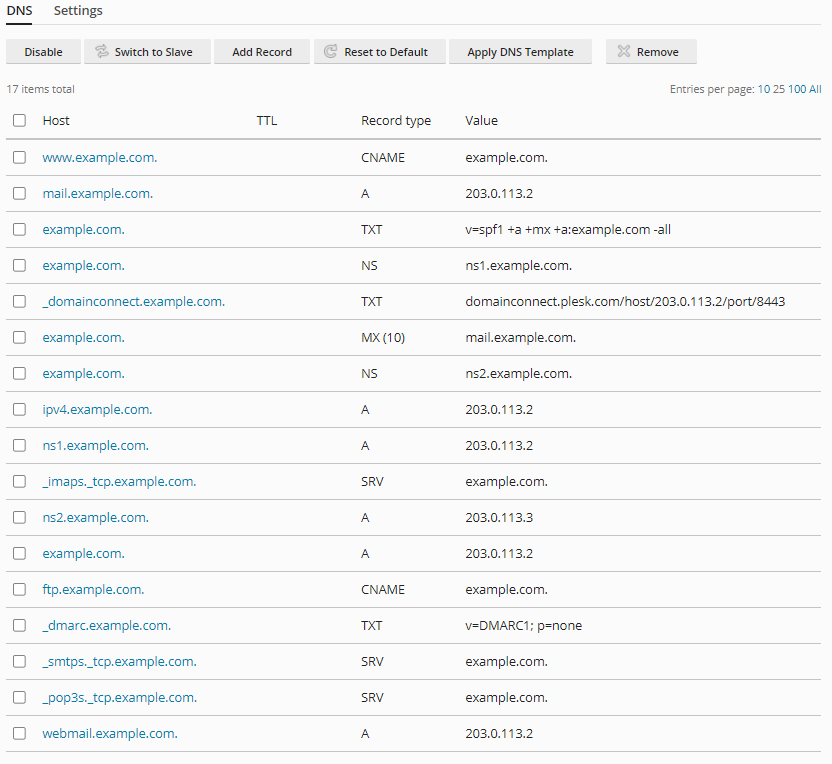
All the required…