A long time ago in a galaxy far, far away… just kidding. The premiere of the new Star Wars movie is still over a week away. However, something else exciting happened on December 3rd – the release of the public beta of the Let’s Encrypt service.
Why should you care? In a nutshell, this service gives you the ability to install a free, trusted certificate on any of your websites. This not only encrypts the connection between the website and the visitor’s browser, but also displays your website as trusted. Meaning, the visitor will not see a warning about the certificate’s authenticity.
This advantage over self-signed certificates (which are free, but not trusted) is especially relevant when securing an E-commerce website. In addition to issuing free SSL certificates, Let’s Encrypt also provides the tools for recalling and renewing them. This, in theory, should save system administrators a lot of time and effort.
You can read more about the project by visiting its homepage, found at Let’s Encrypt.
Why use Let’s Encrypt?
Granted, you could buy a TLS certificate before. But it made little financial sense for small websites with low readership, like personal websites. Another company (StartCom) has also been offering free certificates for some time. However, they come with a number of limitations – no commercial usage, paid certificate revoking, and so on. In addition, you can only request a free certificate from StartCom manually. Meanwhile, you can get free Let’s Encrypt SSL certificates issued automatically, saving time and effort.
The Let’s Encrypt project comes with a number of caveats, namely:
- The issued free ssl certificates remain valid for 90 days, and has to be renewed on a regular basis. Naturally, if you decide to update manually, you’re bound to forget to do it sooner or later.
- The official Let’s Encrypt client features only a CLI interface.
- The client works by editing the Apache configuration files, which introduces the chance of something going wrong (with potentially unpleasant results).
- Nginx support is still in the experimental stage.
- Client installation requires the presence of development tools (autotool, gcc) on the server to compile dependencies (cryptography, psutil, python-pip, python-virtualenv, virtualenv, cffi), which is not generally recommended on a production server.
Let’s Encrypt on Plesk
If you manage your server via Plesk, none of this concerns you. We compiled a number of Let’s Encrypt packages for most of the OSes supported by Plesk. They’re now in a separate repository on http://autoinstall.plesk.com/. In addition, we prepared a Let’s Encrypt extension for Plesk, consisting of two parts:
- Backend – the official Let’s Encrypt CLI client together with a plugin facilitating its integration with Plesk. The plugin uses the Plesk XML API to validate and install certificates.
- The extension itself, providing the user interface and automatically renewing the certificates.
Try Let’s Encrypt in action
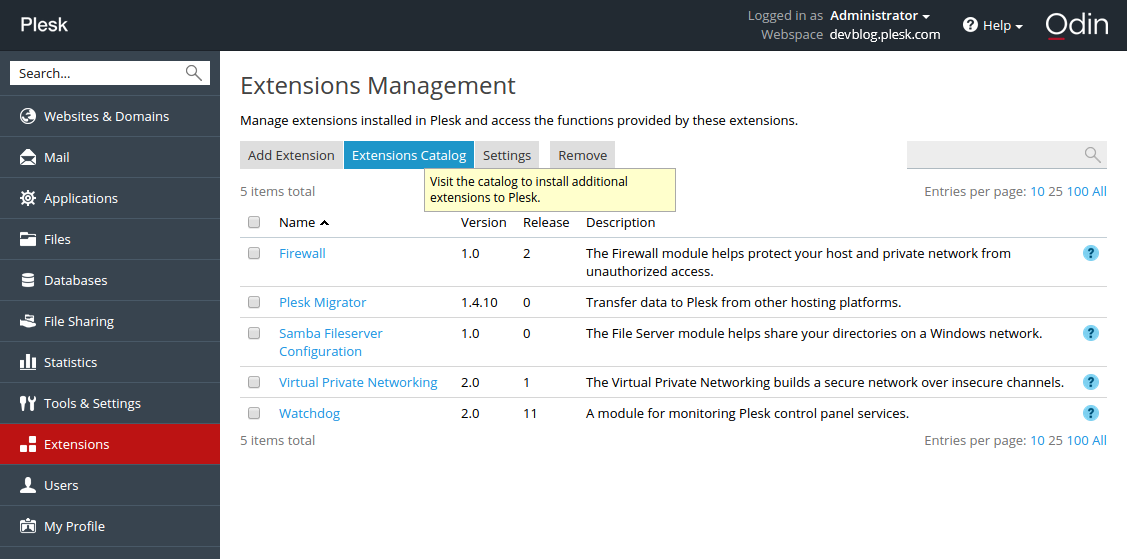
- Log in to Plesk and install the Let’s Encrypt extension via the Extension Catalog:
2. After the installation, run a shell script. It fetches dependencies (sets up repositories and installs missing packages). Then it creates a virtualenv virtual environment and installs the Let’s Encrypt console client with the Plesk plugin inside.
3. Next, click the installed extension, select a website and install the certificate.
If you have already used the CLI client, you will recognize the interactive mode dialog in this web form. On a “success” message, follow the link…
… to open the website and see the green “https” icon in the address bar.
4. Check that the certificate renewal task has been added to Tools & Settings > Scheduled tasks:
Issued certificates are valid for 90 days, but according to the recommendation of the Let’s Encrypt developers, they are renewed on a monthly basis.
So what do you think?
And there you have it! A free certificate for your website, obtained from the Plesk interface, in just a few clicks. It already works on this site, on this page – look at your browser’s address bar!
Give the Let’s Encrypt on Plesk extension a whirl. And let us know what you think in the comments!

