Question
How to disable specific ModSecurity rules in Plesk per domain or server-wide?
Answer
Note: Not all rules can be disabled due to the MODSEC-274 bug in ModSecurity.
-
Via ModSecurity settings
-
Go to Domains > example.com > Web Application Firewall (ModSecurity).
-
In the Switch off security rules section, specify rule IDs (for example, 340003), tags (for example, CVE-2011-4898), or a regular expression (for example, XSS) used in the rules that need to be switched off, and click OK.
Note: The Switch off security rules section is available only when the web application firewall mode is set to On or Detection only.
-
By rule IDs
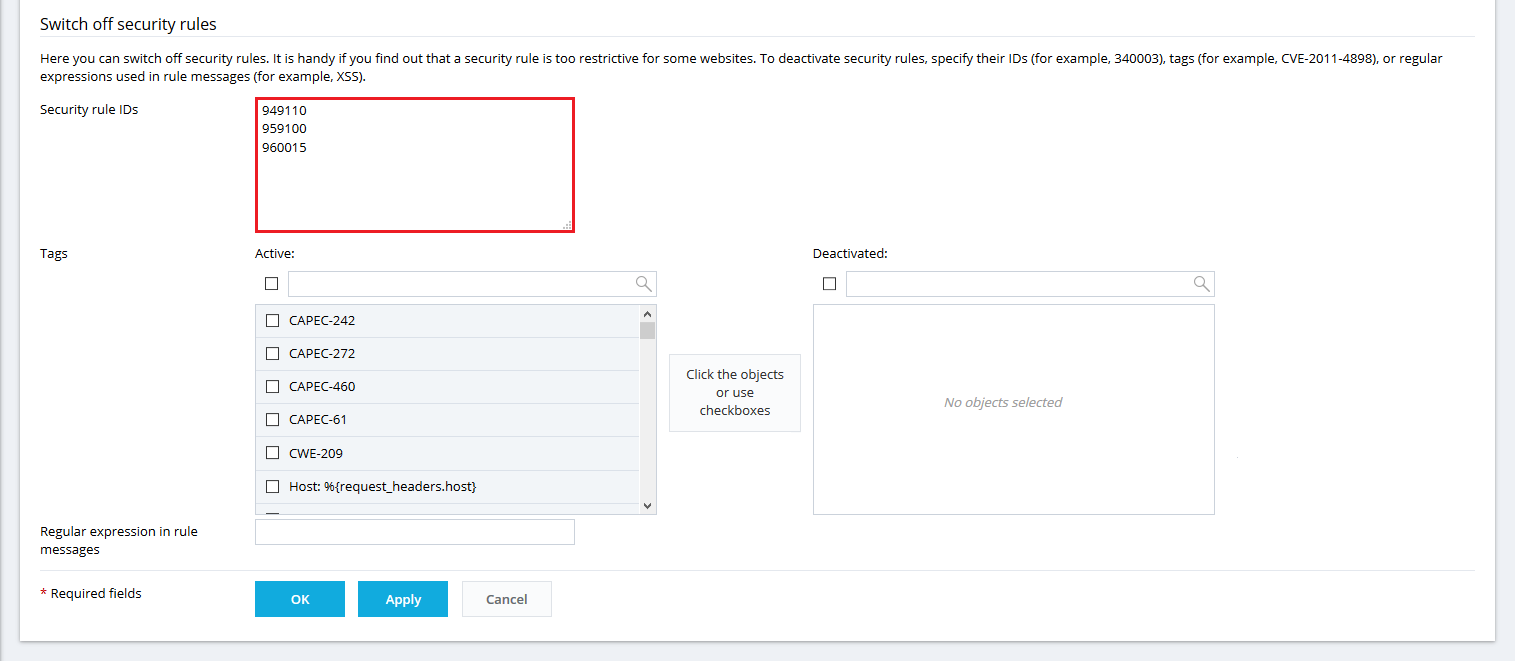
-
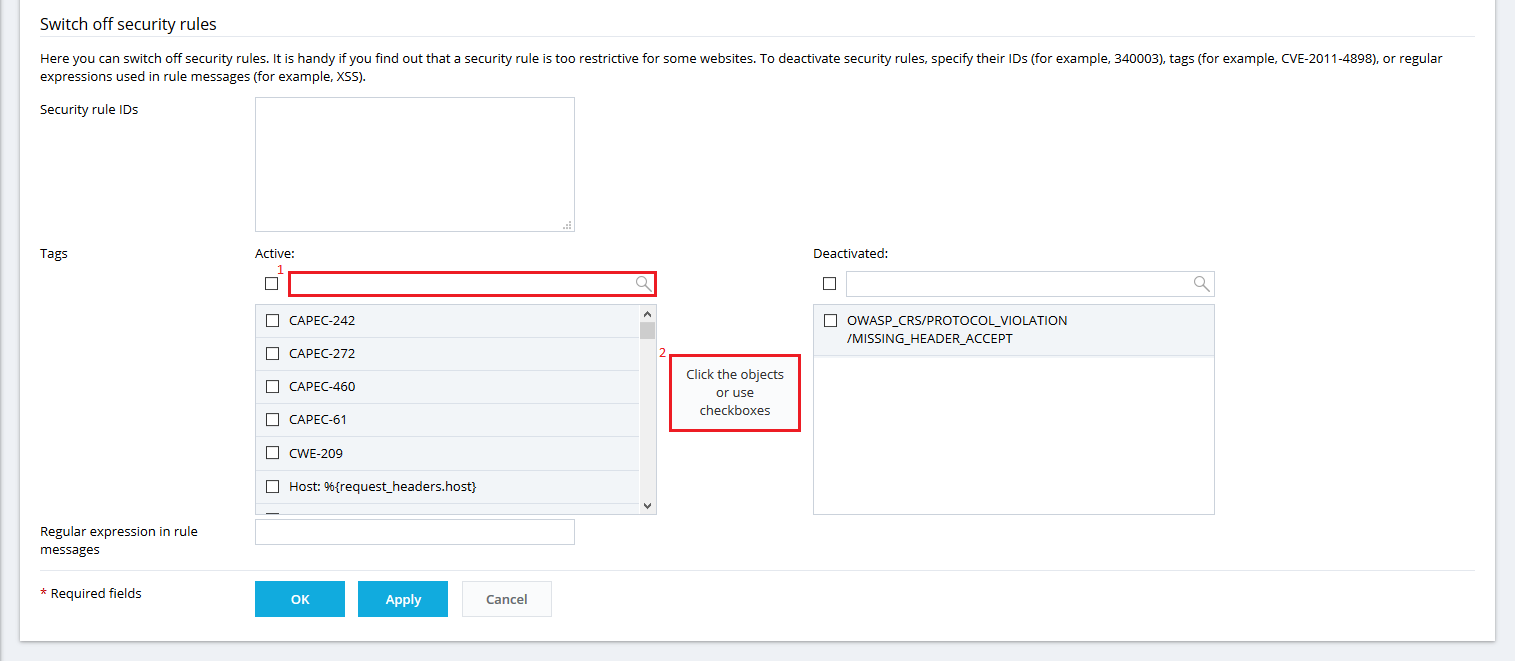
By rule tags
-
-
Via additional Apache directives (Linux only)
Note: This solution is intended for Plesk administrators only.
-
Go to Domains > example.com > Apache & nginx Settings.
-
Create a custom Apache directive and put it into the Additional directives for HTTP/HTTPS fields. In the following example, rules with IDs 340162 and 340163 will be disabled:
Note: It is possible to specify more than one RuleID. Add another line with RuleID on a new line.
<IfModule mod_security2.c>
SecRuleRemoveById 340162
SecRuleRemoveById 340163
</IfModule>OR
<IfModule mod_security2.c>
SecRuleRemoveById 340162 340163
</IfModule>
-
Go to Tools & Settings > Web Application Firewall (ModSecurity) > Switch off security rules.
-
Switch off rules using one of the following ways:
-
By rule IDs. Add IDs from the error message to the Security rule IDs field as shown on the following picture (Click to enlarge) and apply the changes.
Note: If there are several rule IDs, put each on a new line.
-
By rule tags. Add rule tags from the error message from Active to Deactivated as shown on the following picture (Click to enlarge) and apply the changes.
-