Question
How to allow/deny connections from an IP address to a website hosted in Plesk on Windows Server?
Answer
To allow/deny connections from a specific IP address, click on the required section and follow the steps.
-
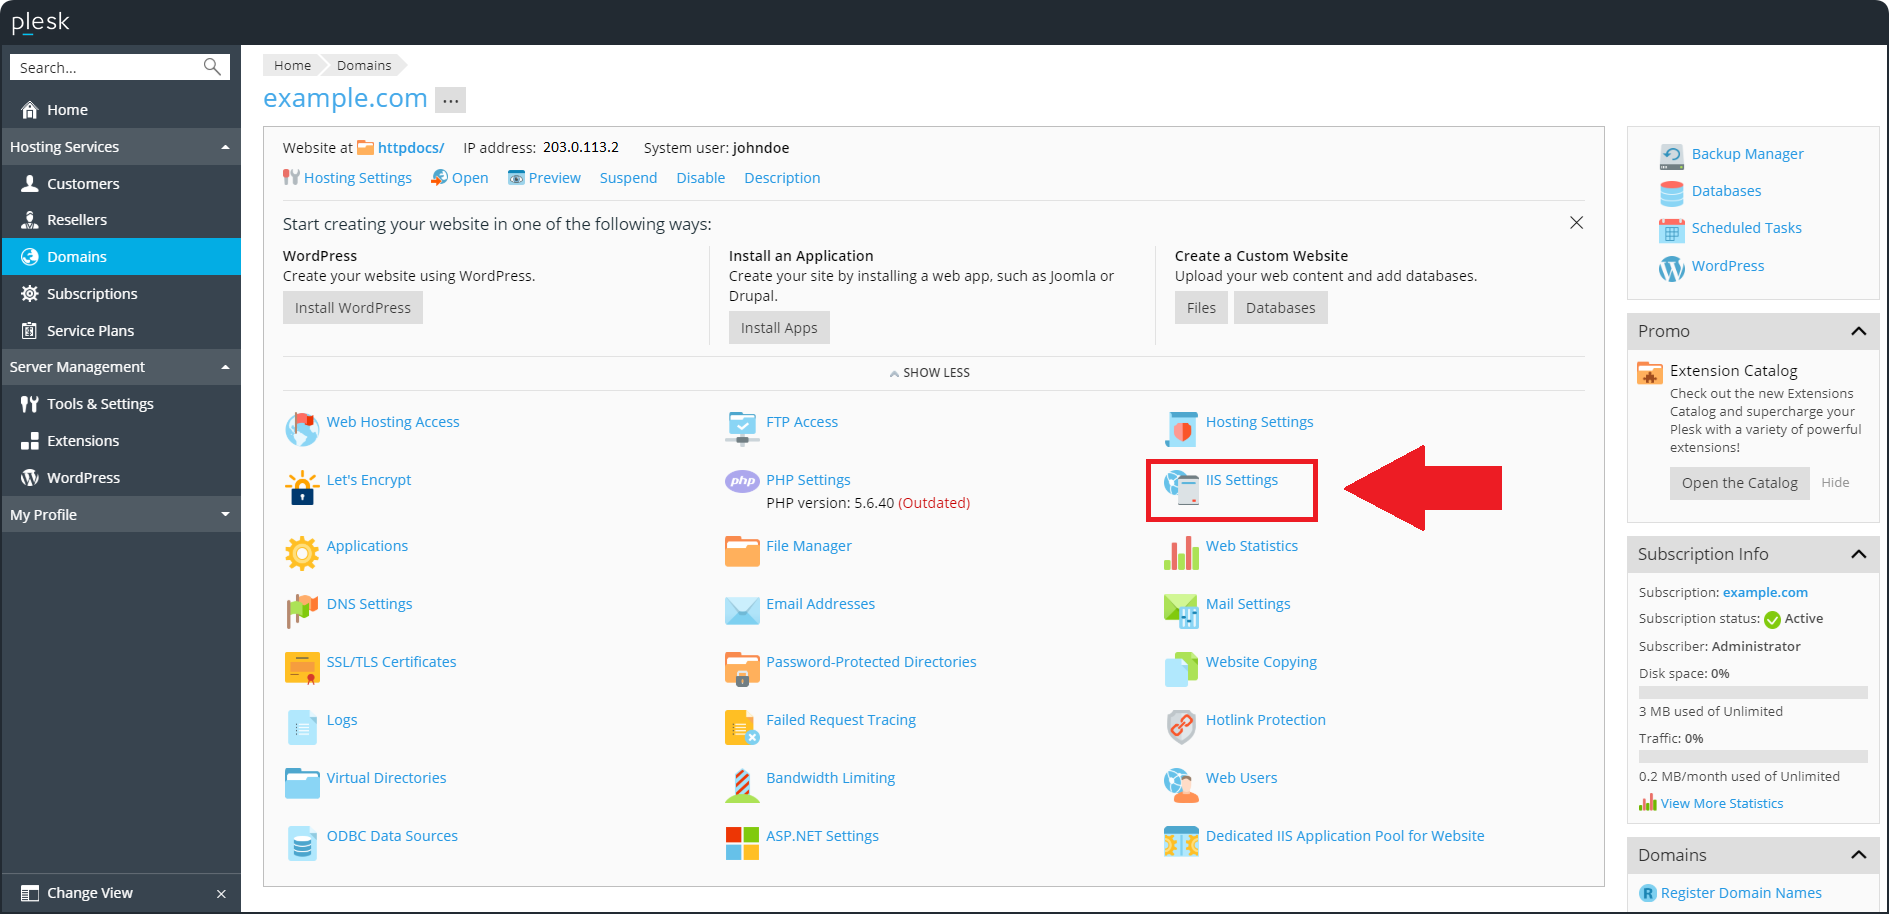
Go to Domains > example.com > IIS Settings:
-
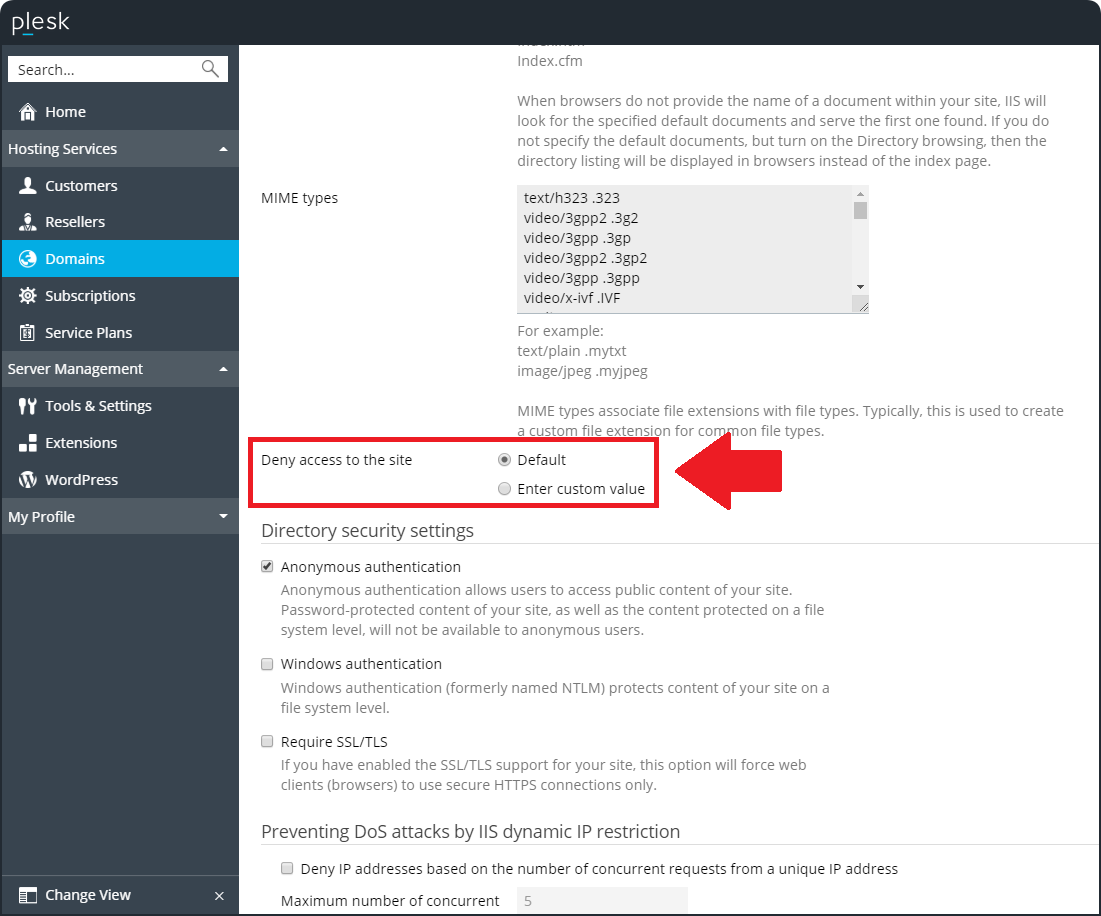
Switch the Deny access to the site directive to the Enter custom value option:
-
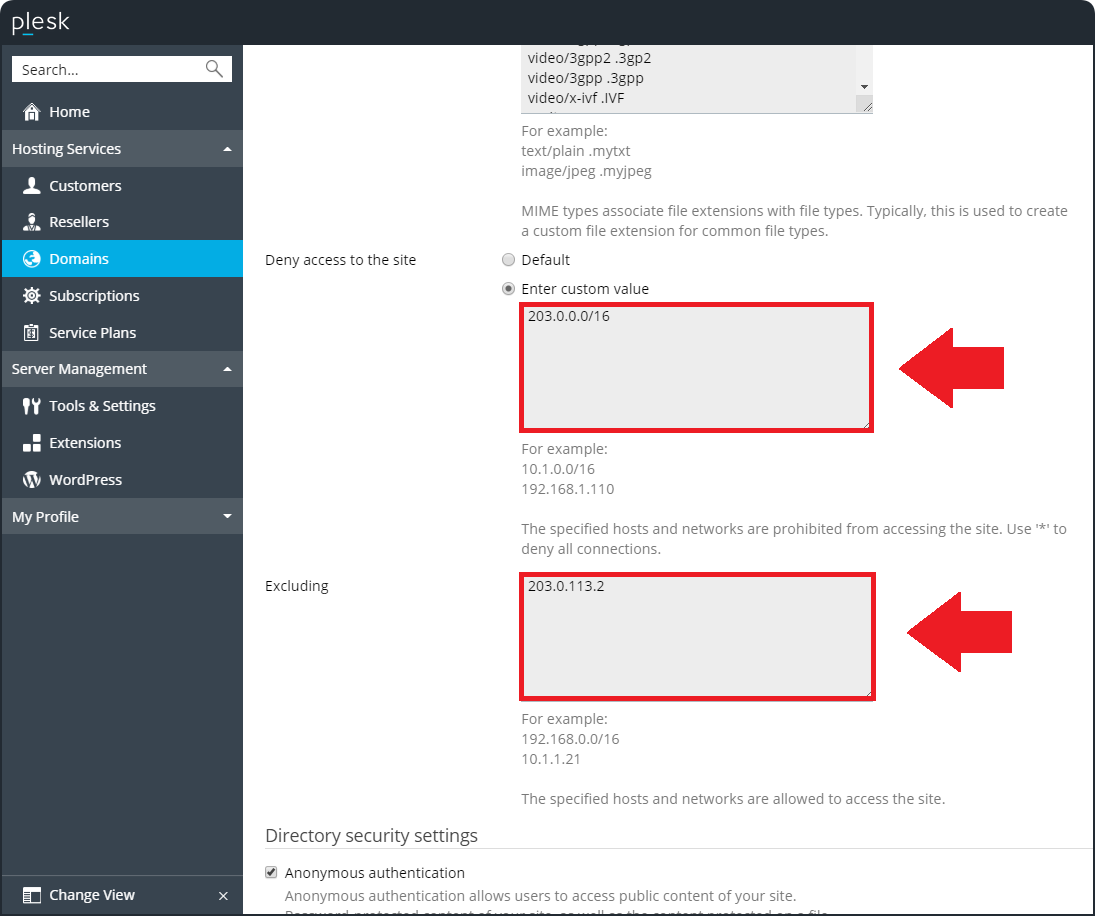
Specify the IP addresses which have to be blocked in the first field and add IP addresses which have to be allowed to access the website in the second field:
-
Click OK to apply changes.
-
Connect to a Windows server via RDP.
-
Start IIS Manager (click Windows Start > type "inetmgr" > click Run command).
-
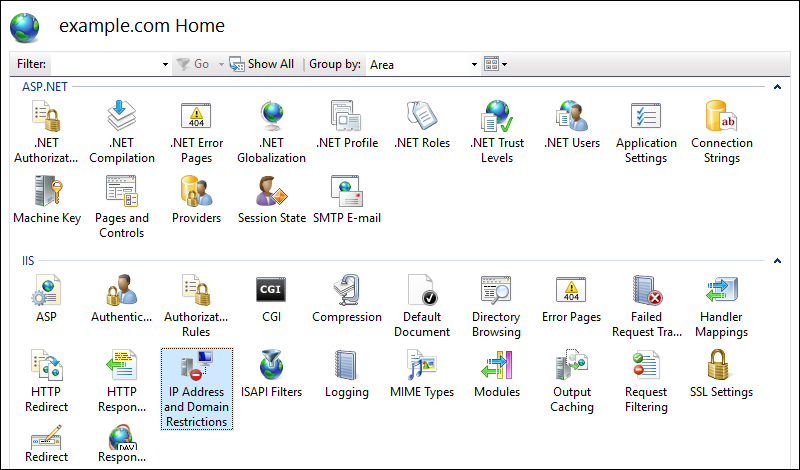
In IIS Manager, expand SERVERNAME > Sites > click on a required website > double-click IP Address and Domain Restrictions (under IIS group).

-
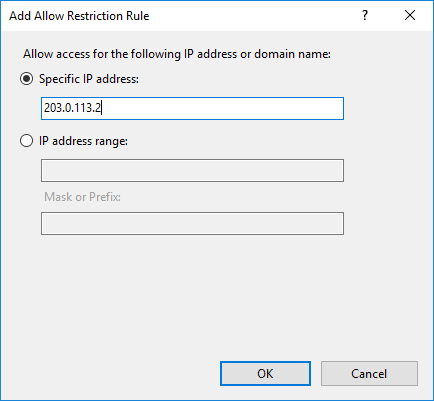
Click Add Allow Entry... (on the right pane) to add an IP address or IP address range which will be allowed to access the website. Click OK.
Repeat this step to add other IP addresses to the list.
-
Once allowed IP addresses have been added, click Edit Feature Settings... and select Deny for Access for unspecified clients. Click OK.
Note: Some Plesk features (e.g. securing a domain with a Let's Encrypt certificate) may not work when connections are allowed from specific IP addresses only.
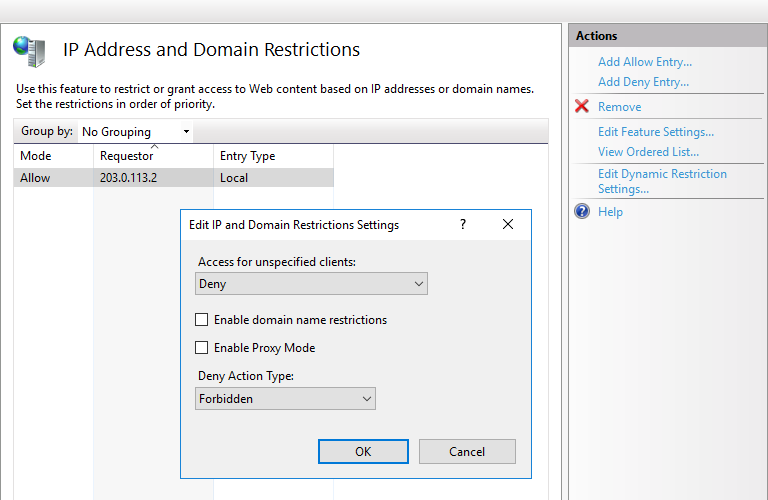
Now, only users with the specified IP addresses are able to access the website.


-
Connect to a Windows server via RDP.
-
Start IIS Manager (click Windows Start > type "inetmgr" > click Run command).
-
In IIS Manager, expand SERVERNAME > Sites > click on a required website > double-click IP Address and Domain Restrictions (under IIS group).
-
Click Add Deny Entry... (on the right pane) to add an IP address or IP address range which will be allowed to access the website. Click OK.
Repeat this step to add other IP addresses to the list.

-
Once denied IP addresses have been added, click Edit Feature Settings... and select Allow for Access for unspecified clients. Click OK.

Now, users with the specified IP addresses are no longer able to access the website.