Question
How to add an already installed Microsoft SQL server in Plesk?
Answer
-
Connect to a server via RDP.
-
Download and install SQL Server Management Studio.
-
Open SQL Server Management Studio:
-
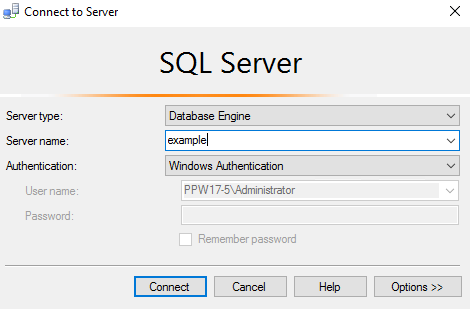
Specify a required database server instance as a Server name
-
Select Windows Authentication as an Authentication
-
-
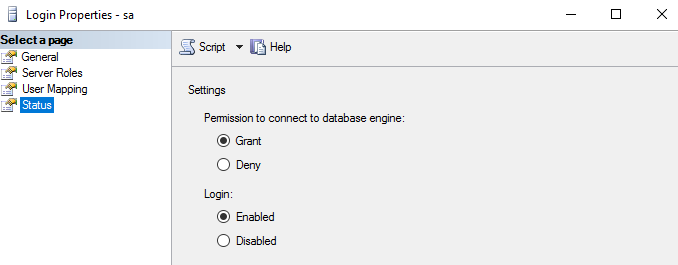
Under the database server instance name, expand Security > Logins > right-click on sa to open its Properties.
-
Set the required password - it will be used to register the instance in Plesk.
-
On the same window, click Status and apply the following changes:
-
Permission to connect to database engine: Grant
-
Login : Enabled
-
-
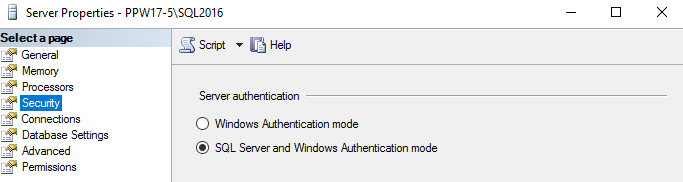
In SQL Server Management Studio , right click on the database server instance name > Properties > Security > select SQL Server and Windows Authentication mode and click OK
-
Start SQL Server Configuration Manager > expand SQL Server Network Configuration > select the database server instance name and enable the following options:
- Named Pipes
- TCP/IP
Note: If this SQL Server instance is installed on a remote Windows Server, allow remote connections by following instructions from this KB article.
-
In SQL Server Configuration Manager, click SQL Server Services > right-click on the SQL Server instance > Restart.
-
Go to Tools & Settings > Database Servers and click Add Database Server
- Fill in the fields:
-
Database server type: Microsoft SQL Server
-
Host name or IP address: .SQLEXPRESS
-
" . " is required before a host name. If this SQL Server instance is installed in a different server, specify the IP address, for example 203.0.113.2SQLEXPRESS
- The correct hostname is a server name from Step 3
-
-
Administrator's username: sa
-
Administrator's password: the password from Step 5
-
-
Click OK.