Watch the video tutorial
If you want to limit public access to specific areas of your website,
you can secure them with a password using the “Protected Directories”
feature. It allows you to designate certain directories of your website
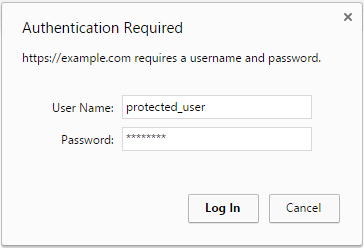
as “password protected”. Anyone accessing such a directory or any
directories and files inside it will be presented with a challenge, and
will need to provide a correct username and password to view the
protected content.

To protect a directory with a password, follow these steps:
-
Go to Websites & Domains > Password-Protected Directories.
-
Click Add Protected Directory.
-
Type in the path to the directory you want to protect (relative to
the domain’s document root directory) and, optionally, a title that
will be displayed to visitors.Note: In Plesk for Linux, the specified directory will be created if it
does not exist. In Plesk for Windows, you can only secure an
existing directory. -
Click OK.
If you decide to change the directory’s title, follow these steps:
- Go to Websites & Domains > Password-Protected Directories.
- Click the desired password-protected directory, and then click
Directory Settings. - Type in the new directory title, and click OK.
Before anyone can access the protected directory, you need to add at
least one user to it. This user will only have access to this specific
directory, and not all of the domain’s protected directories. Every time
you secure a directory with a password, you need to add a user,
otherwise nobody would be able to access it.
To add a user to a password-protected directory, follow these steps:
- Go to Websites & Domains > Password-Protected Directories.
- Click the desired password-protected directory, and then click Add
a User. - Type in the username and password, and click OK.
If you decide to change a user’s password, follow these steps:
- Go to Websites & Domains > Password-Protected Directories.
- Click the desired password-protected directory, and then click the
user whose password you want to change. - Type in the new password, and click OK.
If you decide to remove a user entirely, follow these steps:
- Go to Websites & Domains > Password-Protected Directories.
- Click the desired password-protected directory, and then select the
checkbox corresponding to the user you want to remove. - Click Remove.
Keep in mind that unless there is at least one user associated with a
password-protected directory, no one can browse that directory and its
contents.
If you change your mind and decide to remove password protection from
a directory, follow these steps:
- Go to Websites & Domains > Password-Protected Directories.
- Select the checkbox corresponding to the directory from which you
want to remove protection, and then click Remove Protection.