

For every new software release, barely there would be anything more painful than changes in the user interface. Plesk is known for changing the UI with almost every major release. Some people like the changes, some people don’t , but these changes are always dictated by the industry. We constantly learn from our customers for what is good and what is not and, in Plesk 11.5, we decided to improve the UI one more time. Yes, again. And let us explain why.
Although the Plesk 10.x UI looked attractive, its site operations usability required some improvements. We clearly saw a number of problems there. The majority of them were about ease of site management for site owners in VPS and shared hosting:1. The website management page was not the starting one. This required a number of steps from a user to get to the list of sites after logging into Plesk.
2. The website management page was focused on settings. The list of settings was the first thing users saw on the screen, although a typical site hardly requires changes to its settings more often than once a month.
3. After adding a new site, the users were left frustrated with multiple icons on the screen and the “What do I do next?” question.
We thoroughly read complaints on the forum and thousands of feedback reports sent from the rating form built into Plesk. While ratings were mostly positive and we are thankful for such a high product appreciation, we saw fair complaints there too. And they primarily matched those points above.
Of course, there were complaints considering other Plesk aspects,, but we tried to focus only on site management. Of course, we will get back to other inconveniences too, but a bit later in future releases.
As a result we reworked the Plesk 11.5 UI to a different concept. The concept assumes that Website management is what Plesk was created for and thus it is made the central part of the Plesk interface. So what are the changes?
1. Sites are the most important part of Plesk, so now they are the first thing users see in the Control Panel. We removed the Home tab as these shortcuts appeared to be fairly useless.
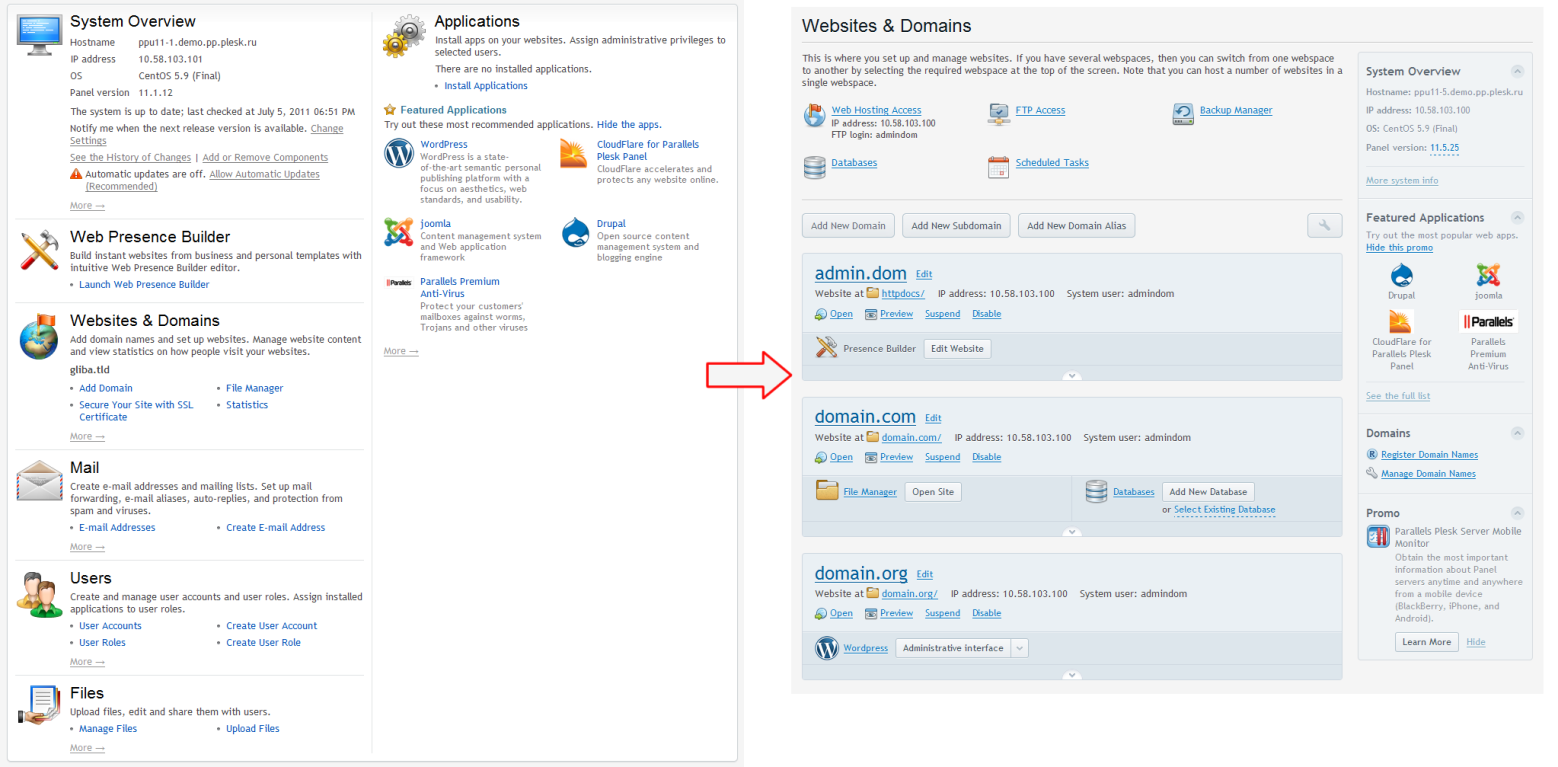
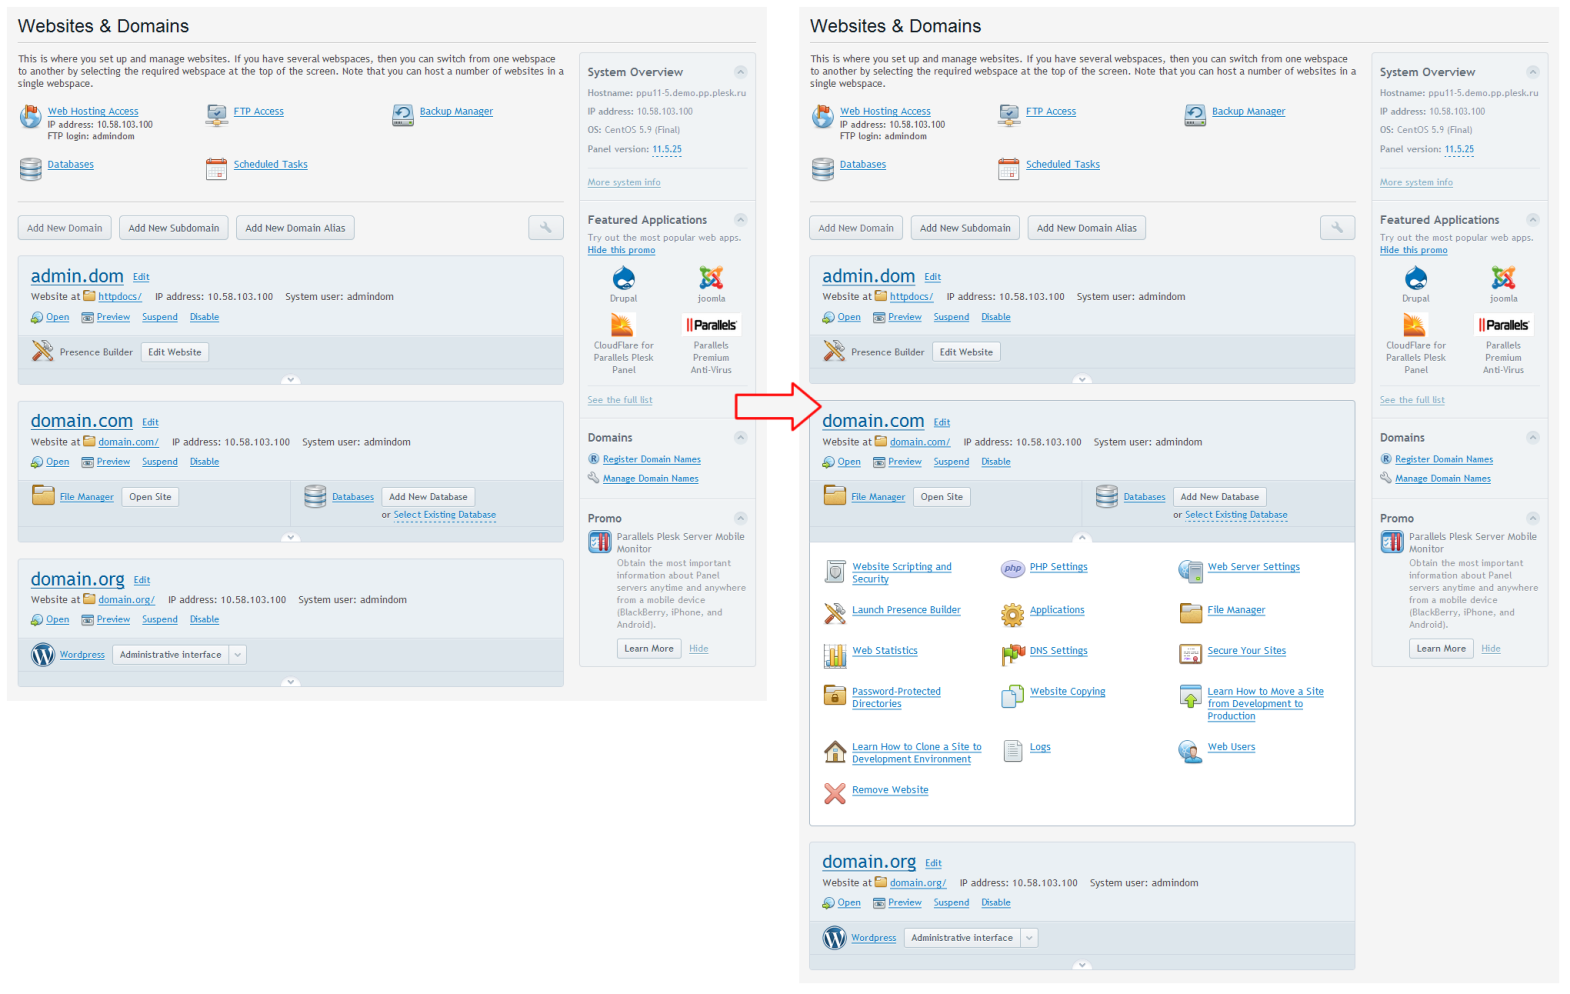
2. Sites are presented in the form of an Active List with direct access to the site-specific actions like installing an SSL certificate or adjusting site’s PHP settings. Each list item representing a website is made bigger to display more information and relevant actions for the site. We see great potential in the Active List representation form and plan to extend its functionality in future Plesk releases.
3. For those who has a lot of sites to operate with (more than 10), we provide an alternative – Classic View.
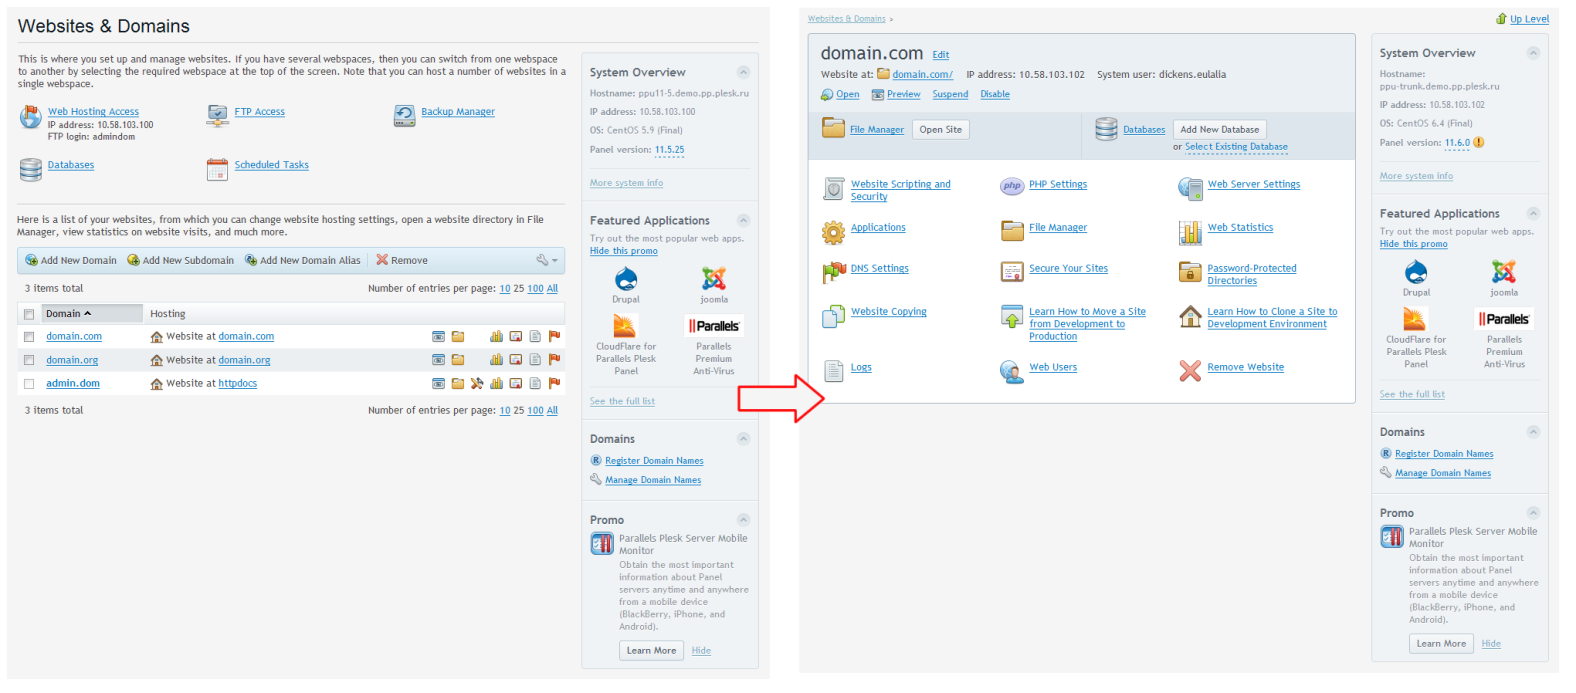
4. Anyway, for each site, you will see a list of operations you have seen before. Moreover, we separated two important options that were very hard to discover: “Website settings” and “PHP settings”. In addition, the new “Web server settings” option will make the website owner’s life easier by giving them the tools to adjust Apache, nginx, or IIS settings directly from the UI.
TBD PICTURE
5. Now, right after you create a new site, you can select one of the quick site construction ways: Presence Builder (if available), Applications (if available) or Generic Site (upload files and create databases).
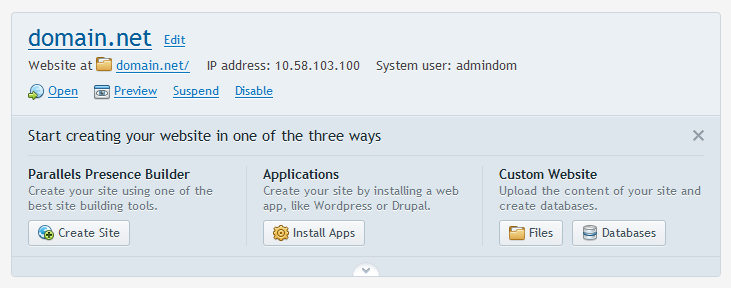
If you don’t use Presence Buider or Applications, it will suggest uploading files and making a database
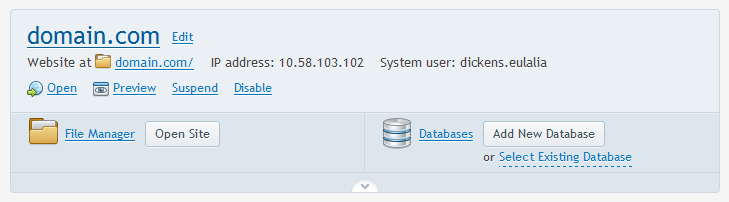
6. Once you make your choice (Presence Builder, Applications, or Generic Site), you will get a shortcut to the selection. For example, if your site is based on WordPress, you will see the link to the WordPress’s administrative interface right below the site name.
TBD PICTURE
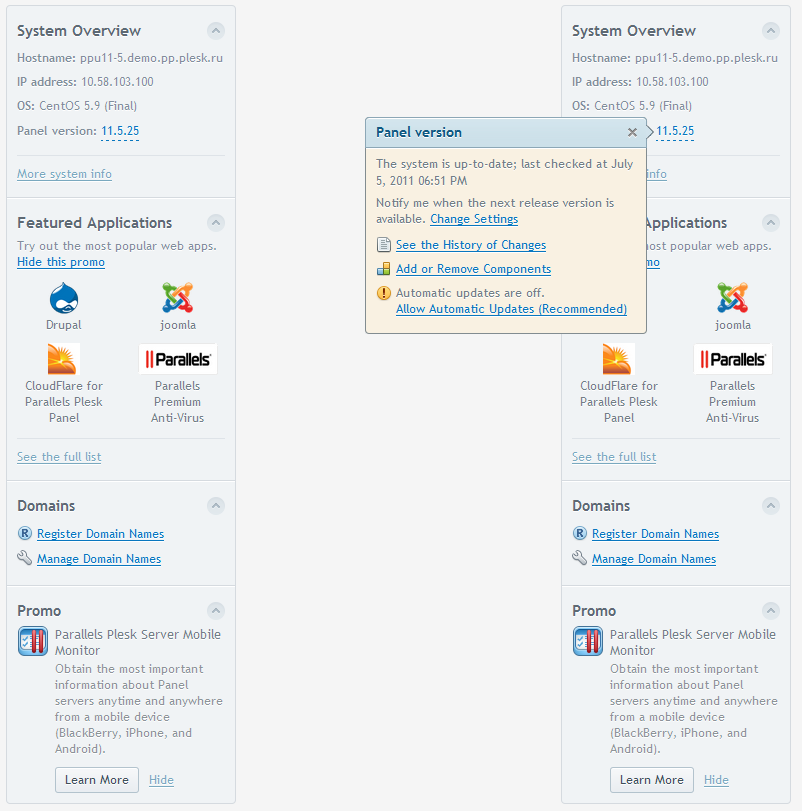
7. The most important information from the Home page (like system info, Plesk version, and so on) was moved to the right sidebar on the Websites & Domains page, so you can easily locate it when necessary.
So if you haven’t seen Plesk 11.5 yet, we definitely recommend you to download and evaluate it.
This is simple –
if you already have a VPS with Plesk, the best path would be as follows:
1. Clone your machine
2. Get Plesk Autoinstaller and a trial key from http://www.parallels.com/download/plesk/11.5
3. Upgrade the clone to Plesk 11.5
4. See the changes by yourself
Alternatively, you can setup Plesk in a new VPS and (optionally) perform the trial transfer of content from your current servers or just explore the new Plesk.
If setting a server is troublesome for you, we can provide servers on our side. Just tell us you need a server in the comments. It is a limited size offer – first come, first served.
If you already evaluated Plesk 11.5 and, specifically, the UI changes, please tell us what you think in this survey about Plesk 11.5 UI.