
Now we’ve established that, if you want your website to succeed, you need to understand WordPress SEO and implement best practices. If you’re a WordPress admin, you might think SEO has all been taken care of. But while WordPress does cater for SEO to an extent, there’s still more you can do to improve your website’s performance.
To keep up, you’ll need tools that’ll help you audit your website, and monitor its performance continuously. For this, we recommend the Yoast SEO WordPress plugin and Plesk SEO Toolkit. So let’s dive into how to use these tools so they can get your SEO started right.
Yoast SEO WordPress Plugin
With more than five million installations and counting, Yoast SEO rightly claims to be the #1 WordPress SEO plugin. Since 2010, Yoast SEO has been helping WordPress site masters improve their search engine rankings. Yoast SEO is among the top four downloaded WordPress plugins, and is likely to be already installed on your WordPress.
Plesk SEO Toolkit
SEO Toolkit is a Plesk extension which uses the power of XOVI SEO engine. This tool helps website owners improve their website’s SEO, and track their performance. Plesk SEO Toolkit offers insights into website rankings in search engines, as well as social media reach. You can also compare your websites to main competitors, plus receive advice on how to best optimize your website to attract more visitors.
Take off with Plesk SEO Toolkit
If you’ve got an existing Plesk installation, you can just login and go to Server Management > Extension. Then Find SEO Toolkit and click Install Now. You’re now ready to start with the free version of the extension. Alternatively, you can buy a license and install it through Server Management > Tools & Settings > License Management > Additional Licenses.
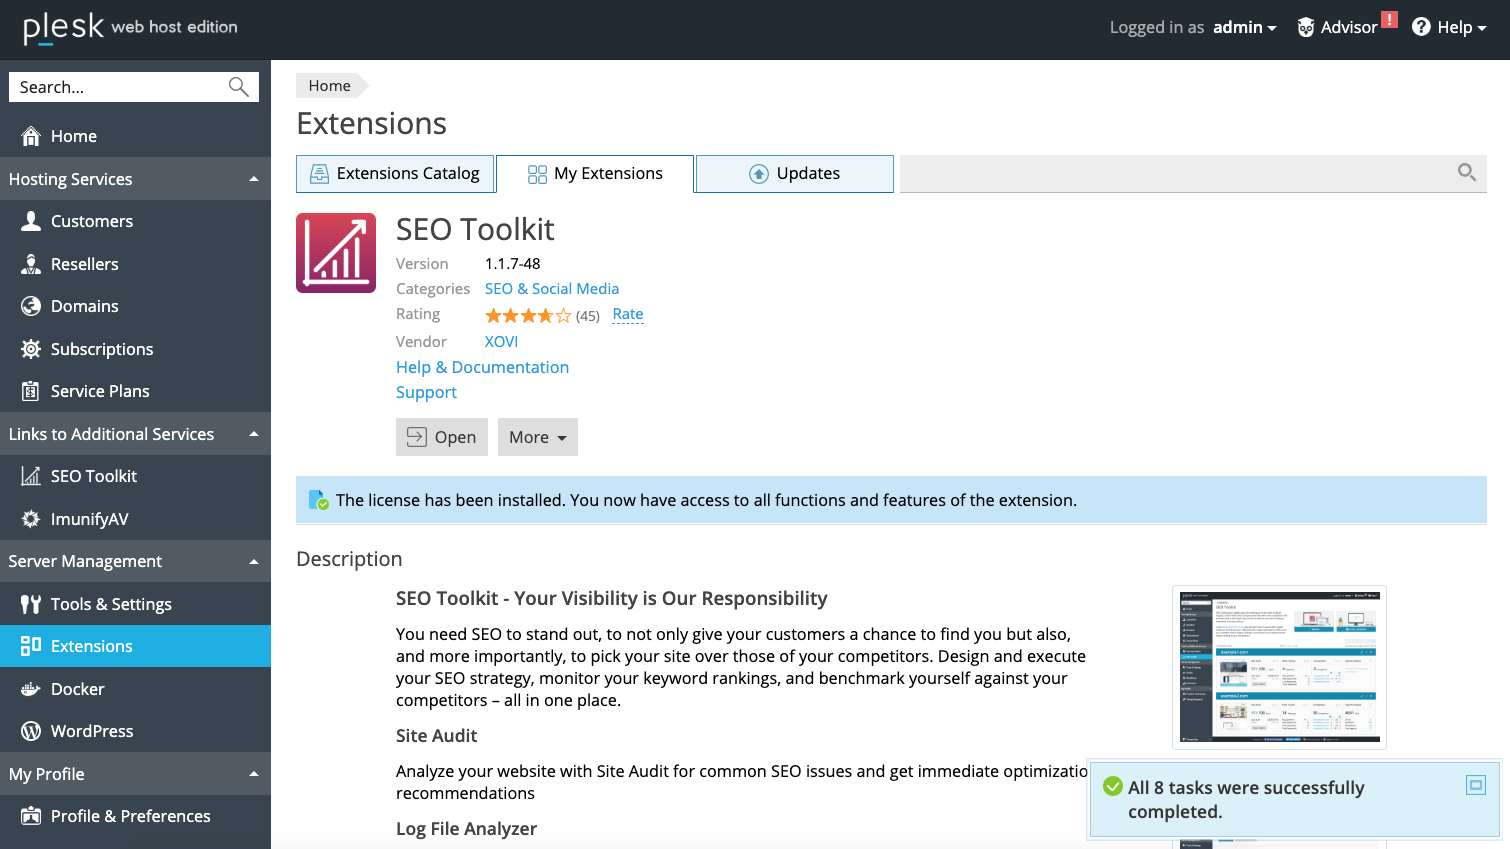
You can now access the extension at any time through the SEO Toolkit link in the main menu.
If you’re new to Plesk – no problem! If you like, you can Download Plesk free from here. Then install it on your internet host where your WordPress site is located. However, you can also ask your internet hosting provider to install it for you.
The cool thing about the Plesk SEO Toolkit is that it can take care of all your websites hosted on the server where it’s installed. You just need to tell it which website to connect to when you start:
- Navigate to SEO Toolkit
- Click Wizard
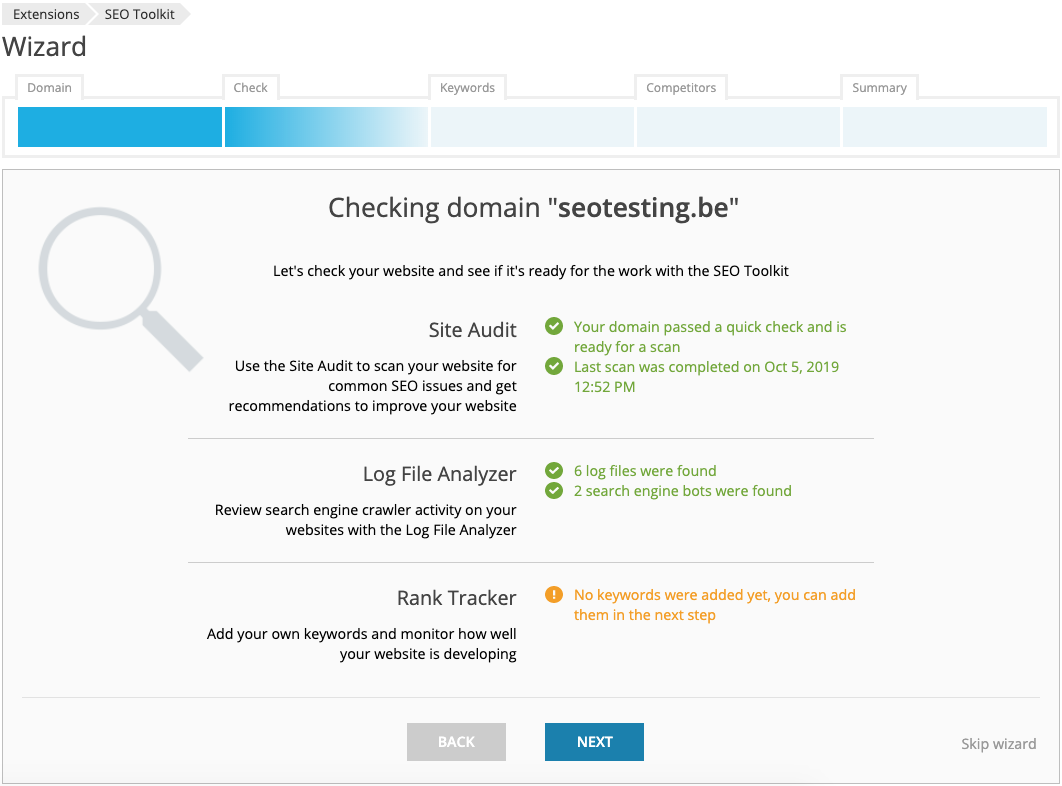
- Select the domain of your WordPress website
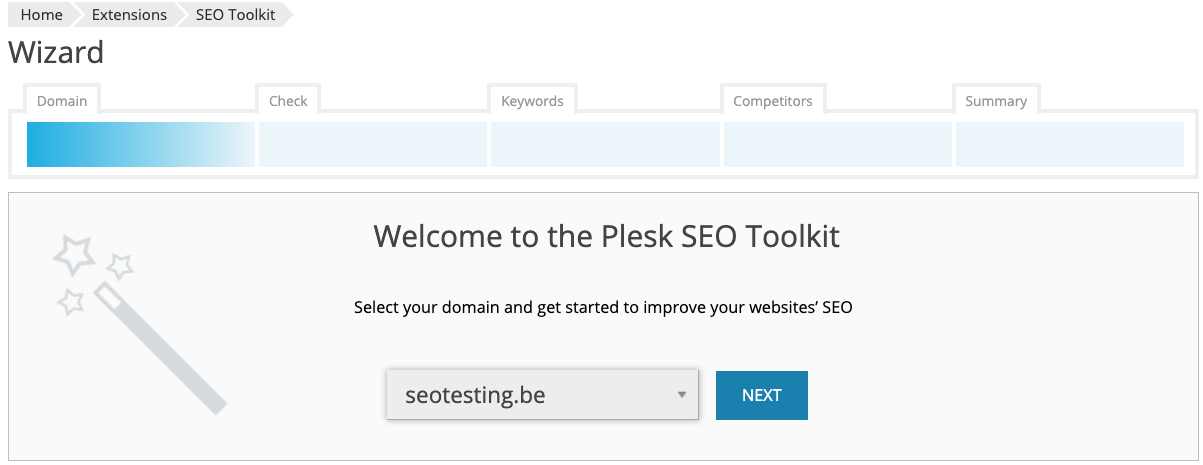
- Click Next. The tool will do a first audit of your website and present the results. You can now follow through the next steps. But, for now, we’ll quit by clicking Skip wizard instead.
Now whenever you open SEO Toolkit, you’ll have direct access to your website(s) with an overview of all important SEO statistics and messages.
Installation for Yoast SEO
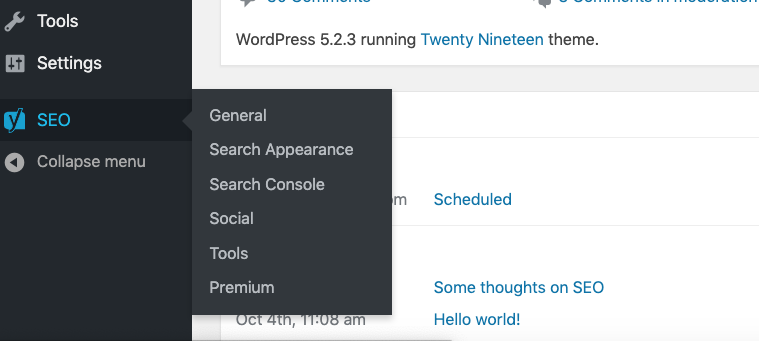
In WordPress – navigate to Plugins > Install new, find Yoast SEO, click Install Now, then Activate. You’ll see a new menu called SEO.
Now start the Configuration Wizard found on the Dashboard of the General page. It’ll show you all the relevant basic SEO settings step by step:
- Activate site for indexing through search engine spiders
- Select the type of site
- Enter information about the company represented for use in Google’s Knowledge graph
- Select whether pages should be shown in the search results. This controls which content will be included in the sitemaps (see discussion below in the section ‘Creating XML sitemaps’
- Select if there will be single or multiple authors
- Set up the template for page titles
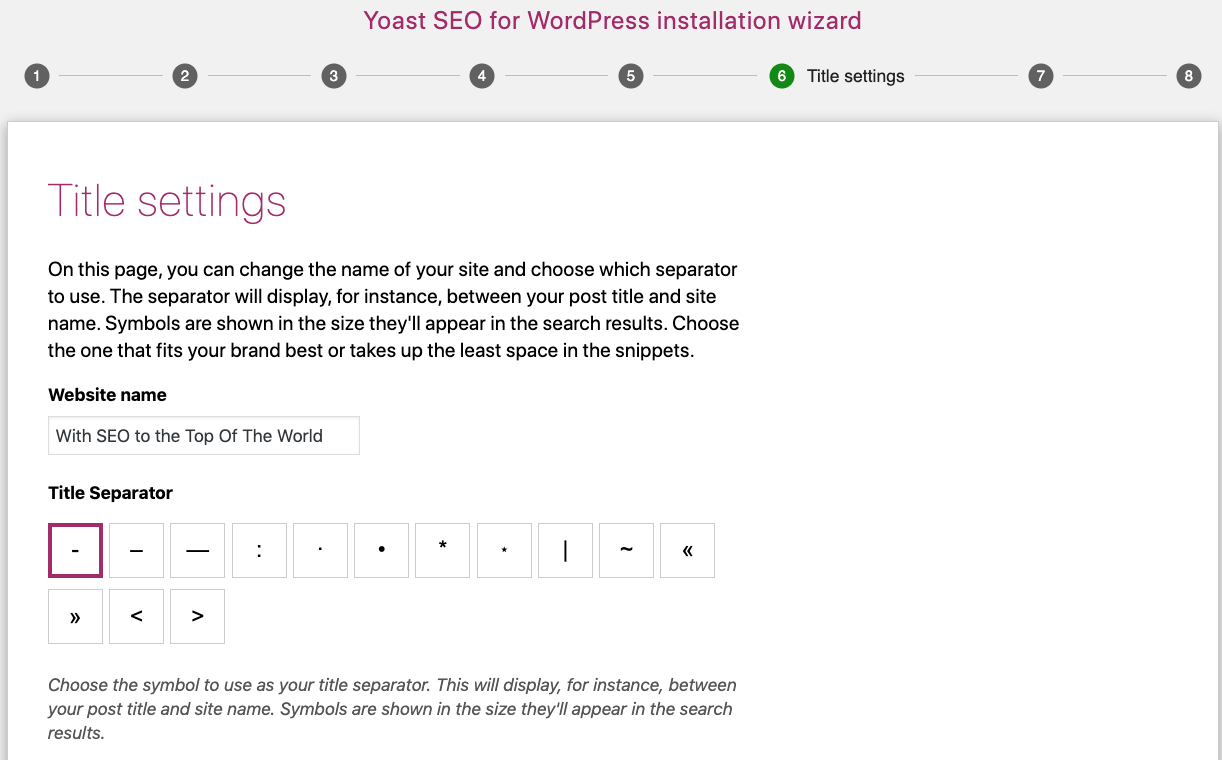
Your basic settings are now complete. But you can return to the configuration wizard anytime if you need to change any settings.
Using technical WordPress tuning tools
Once installed, you’re finally ready to get down to the exciting business of SEO.
Connecting to Google Search Console
After adding your website to the search console, Google needs to verify your website belongs to you. Yoast SEO makes this easy:
- Choose the verification method HTML tag
- Copy the meta tag in the box
- In WordPress – open SEO > General > Webmaster tools
- Paste the code in the Google field and click Save Changes.
- Go back to Google Search Console and click Verify.
Google can run into problems with your site when indexing it. But the Google Search Console tracks and displays these errors, and alerts you whenever something critical happens. It can also guide you through possible solutions.
Creating xml sitemaps
It’s best practice to let Google know about the pages and posts you want indexed by submitting a sitemap.
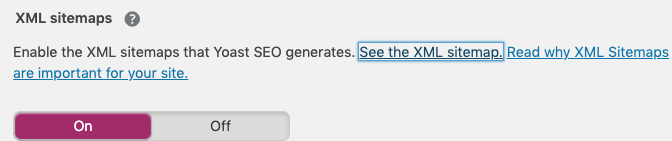
Yoast SEO takes care of this automatically. You can verify this by:
- Navigating to SEO > General > Features
- Finding the toggle XML sitemaps and expanding the box
- Clicking on See the XML sitemap to view the file that was generated.
Yoast SEO will update your sitemap automatically when you add or remove a page, post or category.
Creating Canonical URLs
Yoast SEO renders the correct canonical URL for almost any page type in a WordPress install automatically.
If you ever need to change it for a specific piece of content – be it a post or a page – you can do so in the content settings.
SEO Auditing with Plesk SEO Toolkit
Plesk SEO Toolkit enables you to keep tabs on everything SEO-related on your website.
The Site Audit feature lets you do a quick SEO check as a first step.
- To start the site audit:
Click Wizard on the main page of SEO Toolkit, then select the domain you want to check and click Next.
The Site Audit will show you immediately if all of your important settings are correct.
- To do a complete scan:
Open up the domain tab on the main page and click Site Audit. Then click Rescan <domain>.
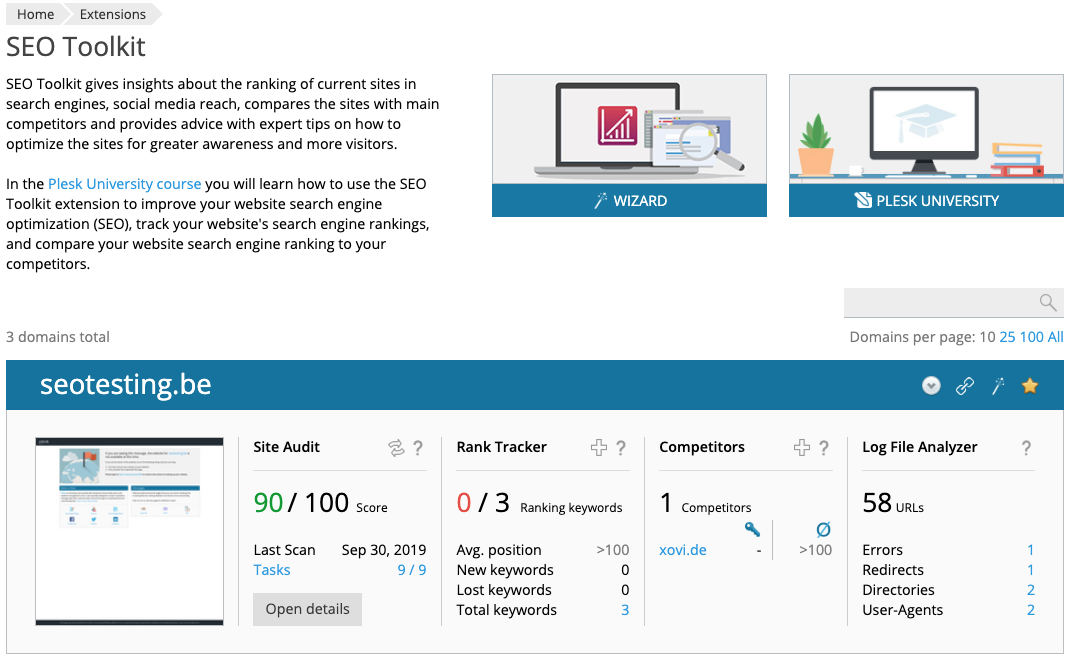
The scan can take some time to complete, depending on the number of pages your site contains. The results show as a summary of your site’s health.Below that you’ll find a detailed listing divided into Content, SEO and Technology. For each item, the tool displays the state (ok or error), the number of occurrences, and its importance.
The power of Site Audit is in the large number of details it checks automatically. On everything from blocked elements through to problems with indexation, server errors, issues with canonicals, loading time, and content audit. Noone could ever keep all of these in mind, let alone check them manually.
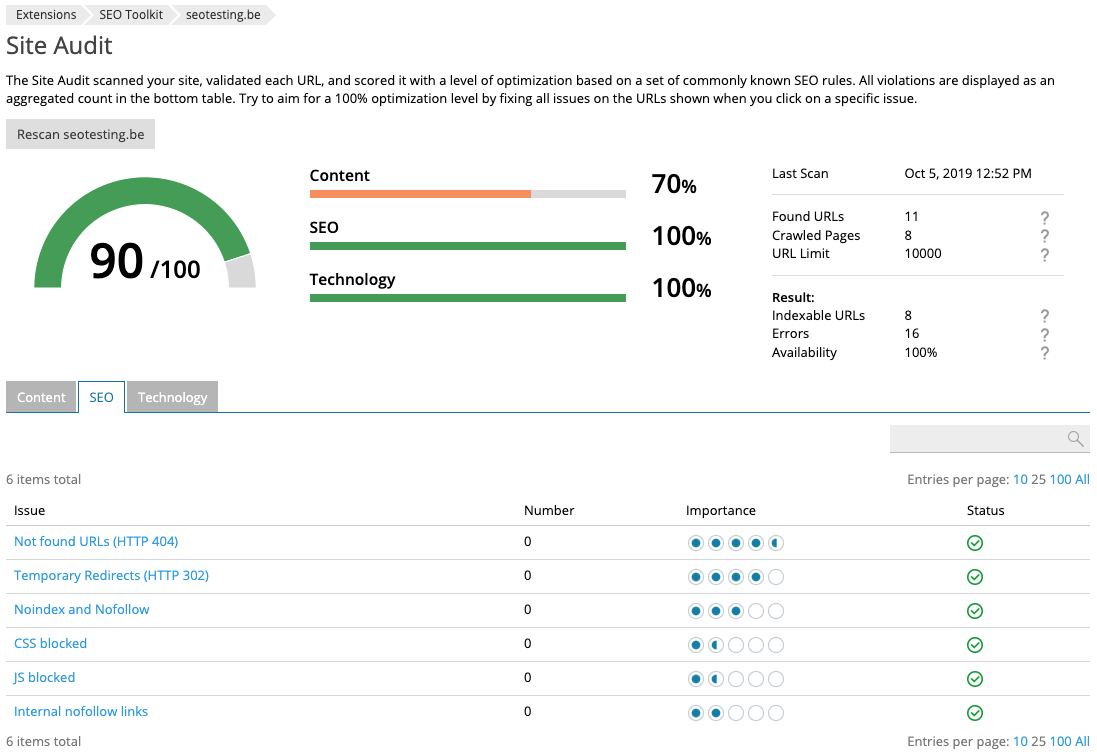
You can drill down into every issue to find the exact place, setting or page where the issue was found, together with recommendations for solving the problem.
But there’s more! To help you keep track of all fixes, Site Audit creates tasks and task reminders for you.
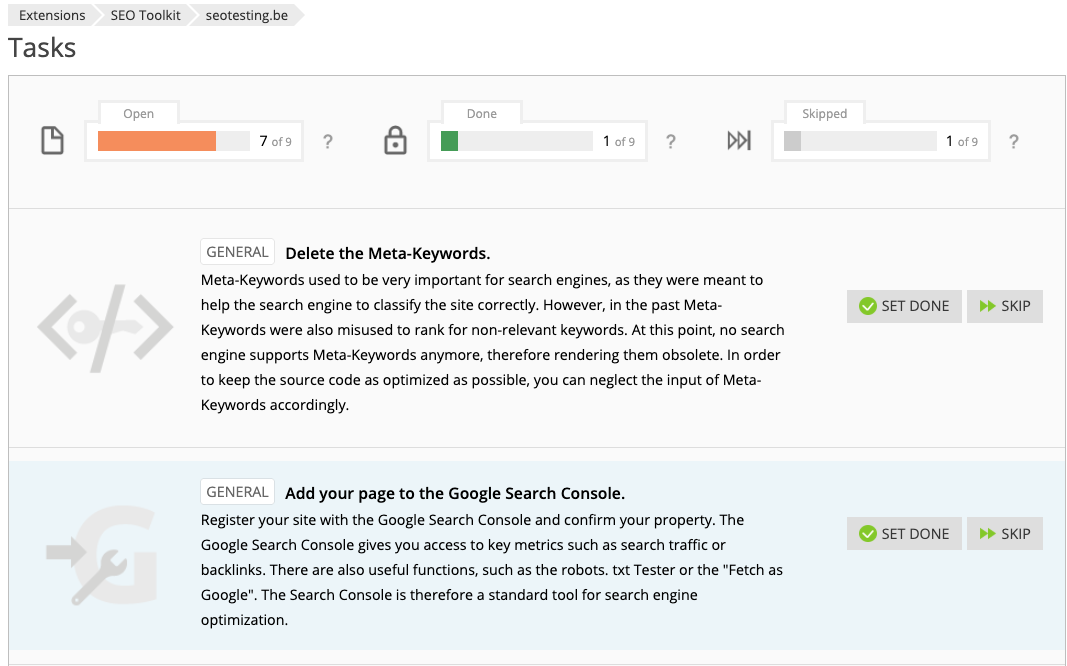
Site Audit rescans your site automatically every 20 minutes. All you have to do is come back regularly to see if any issues need your attention.
SEO Auditing for Yoast SEO
It’s important to make sure that while your site changes and grows over time, you preserve its optimal state. Both Yoast SEO and Plesk SEO Toolkit can help you do this well.
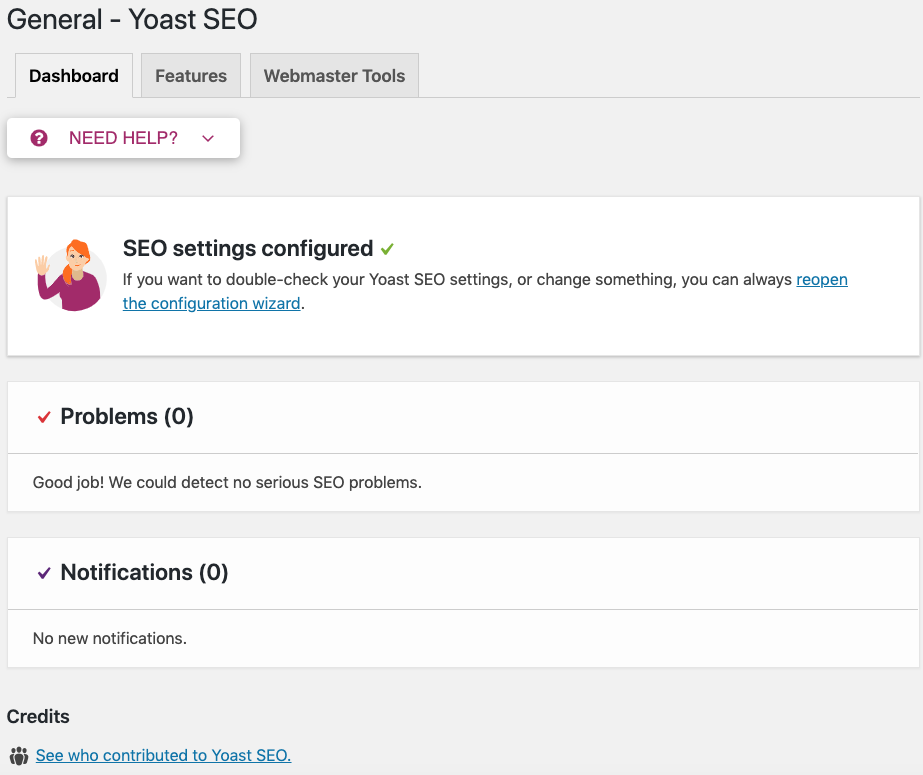
If the Yoast plugin finds any issues with SEO on your site, it’ll show you a message on the dashboard. However, if everything is fine it’ll look like this:
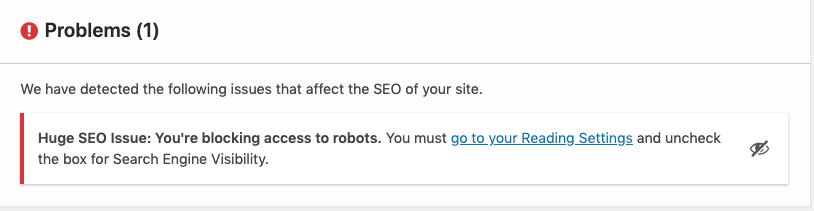
Otherwise, you’ll see a warning message along with information on how you can resolve the issue:
Getting your content right
Are you happy with the results so far? Now that we’ve covered the technical side of things, it’s time to use the power of these two SEO tools to create and optimize content.
1. Audit your Content with Plesk SEO Toolkit
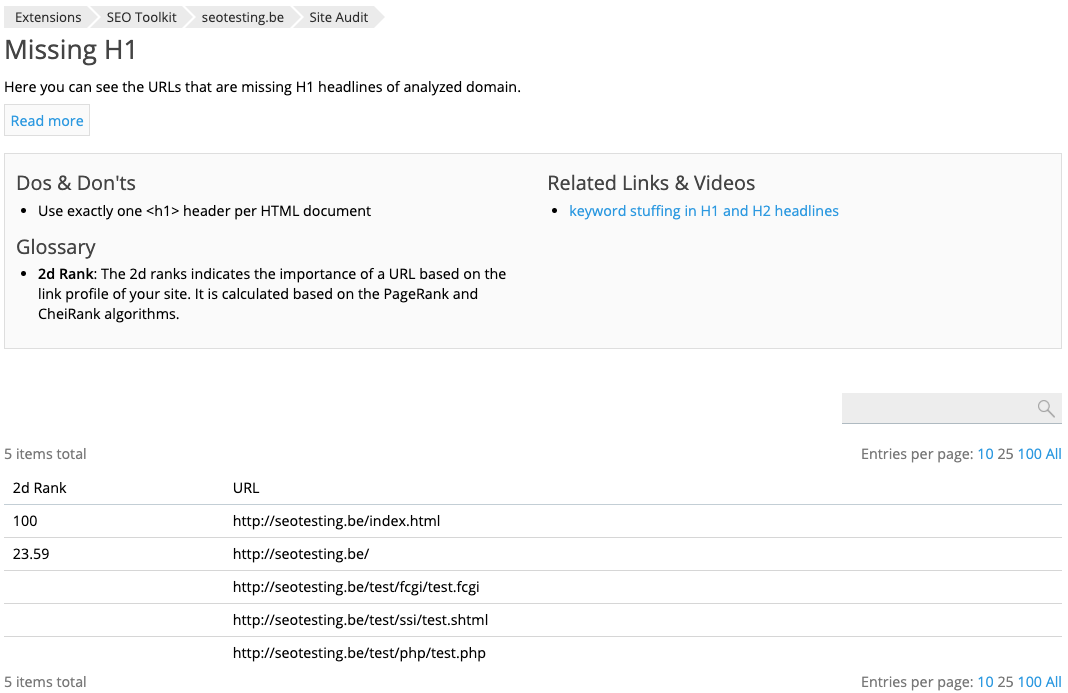
SEO Toolkit’s Site Audit component runs periodic checks on your site, and your content. You’ll find all issues related to content on the Content tab in Site Audit. The Tasks component also helps you work on content issues by creating a list of recommended tasks to help you improve your site’s SEO. Actionable insights cover issues with duplicated content, defective links, missing H1/H2/H3, title tags, and more.

To quickly check on recent issues and stats – simply visit the start page of SEO Toolkit where you’ll see the overall health score, as well as the number of open and already completed tasks at a glance.
2. Optimize your content
Yoast SEO supports you with content creation right where you type it. So at the bottom of the page or post editor, you’ll see the Yoast Meta Box. From here, it’ll help you by analyzing your text and document settings on the fly and presenting you with any issues and recommendations it finds.
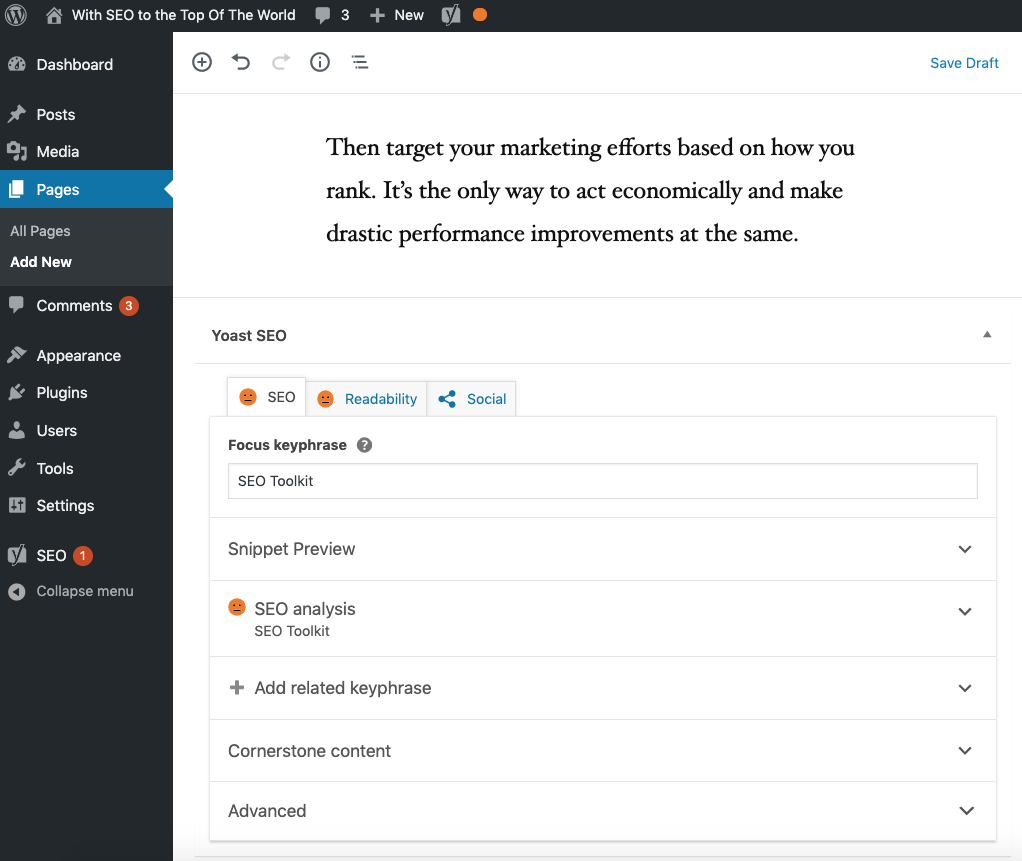
In the box, you’ll see an instant overall rating of how you’re doing in terms of SEO and Readability – indicated by the red, orange or green icons.
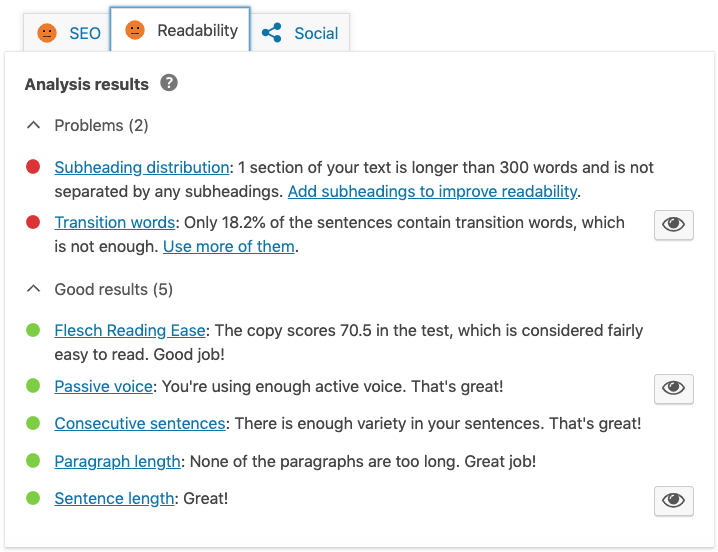
3. Understanding Yoast’s SEO Analysis
In the section SEO analysis, you’ll find a list of all details checked and issues found, together with clear recommendations on how to fix them. This gives you an idea of which problems to tackle first.
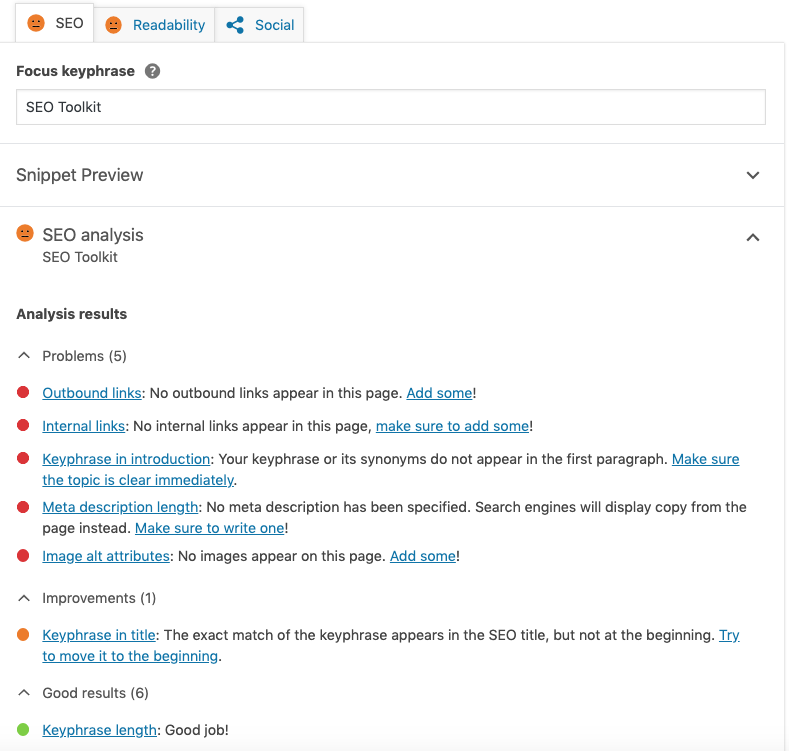
The features in the Yoast meta box can also help you optimize the meta-information for a page or post.
Open the section Snippet Preview to check how your search result will look in Google SERPs. You can also edit and optimize the title and description.

Don’t forget to create a highly-focused meta description – since this is the text Google uses to display a summary of your page in the SERP. Both the title and description have a recommended length, as indicated by the green or red line below the editor box. The SEO analysis tool also automatically checks the readability of your text, taking into account sentence length, use of active vs. passive voice, and the Flesch reading score.
DIY SEO
Hopefully this guide proves that you can confidently tackle SEO yourself – with the help of two SEO tools: Yoast SEO and Plesk SEO Toolkit. Not only do these tools remove the burden of tweaking the technical aspects of SEO, but they also actively support you in creating fully-optimized content.
Next up: How to analyze your on-page SEO success for WordPress.
Gain traction with Google by checking keyword rankings, comparing your site with competitors and ensuring crawlers can do their job properly.
We’d love to hear your experience of working with Plesk SEO Toolkit or Yoast SEO. So let us know how they’ve helped you optimize your WordPress website in the comments below.


No comment yet, add your voice below!